Errors and Warnings summary tool (available on the top tool-bar)
 Form Editor. To use this feature, put your cursor on the parameter
of interest. If that parameter is blue, you will see the cursor change
to
Form Editor. To use this feature, put your cursor on the parameter
of interest. If that parameter is blue, you will see the cursor change
to  . If you then click
on the parameter, the relevant sections of the Call for Proposals/Primer
will then be displayed in a pop-up Help window.
(error) or a
. If you then click
on the parameter, the relevant sections of the Call for Proposals/Primer
will then be displayed in a pop-up Help window.
(error) or a
 (warning); see the separate movie or
document .
Errors are either missing information, incomplete or
illegal information, or a problem reported by the
Visit Planner. There are four ways that diagnostics are
reported in APT.
Errors and Warnings summary tool (available on the top tool-bar)
(warning); see the separate movie or
document .
Errors are either missing information, incomplete or
illegal information, or a problem reported by the
Visit Planner. There are four ways that diagnostics are
reported in APT.
Errors and Warnings summary tool (available on the top tool-bar) Proposal Information in the Tree Editor, and fill
in the appropriate information.
Proposal Information in the Tree Editor, and fill
in the appropriate information.
Those items marked with a in
the Form or Tree Editor are either incomplete or have incorrect
values. A finished proposal should have no errors (and few, if any, warnings) present on any page or
in the tree editor. The diagnostics may suggest what is missing, but
more information can be obtained by using the context-sensitive
help.
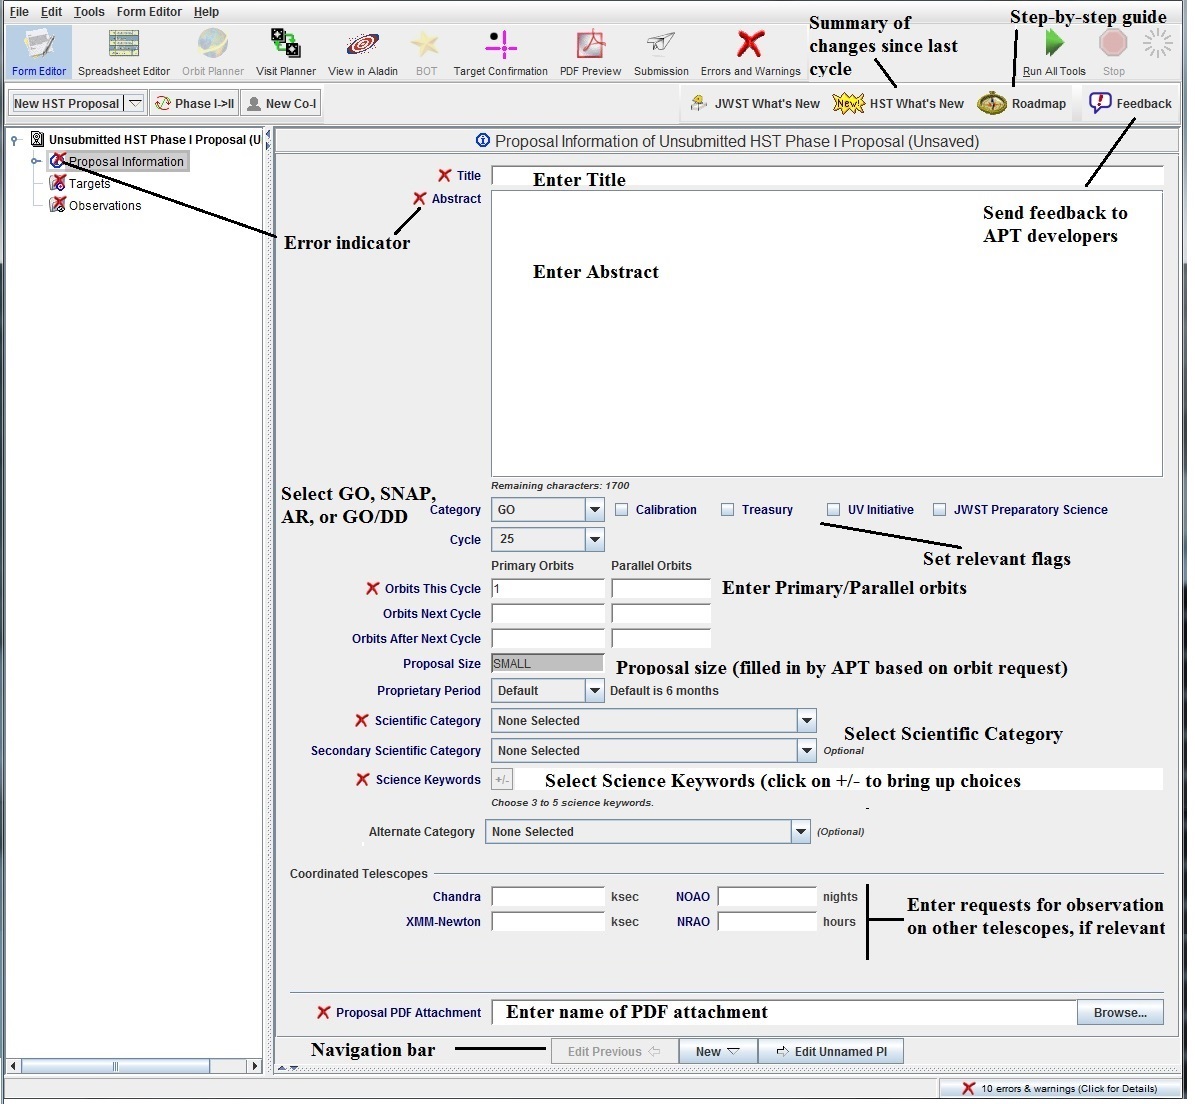
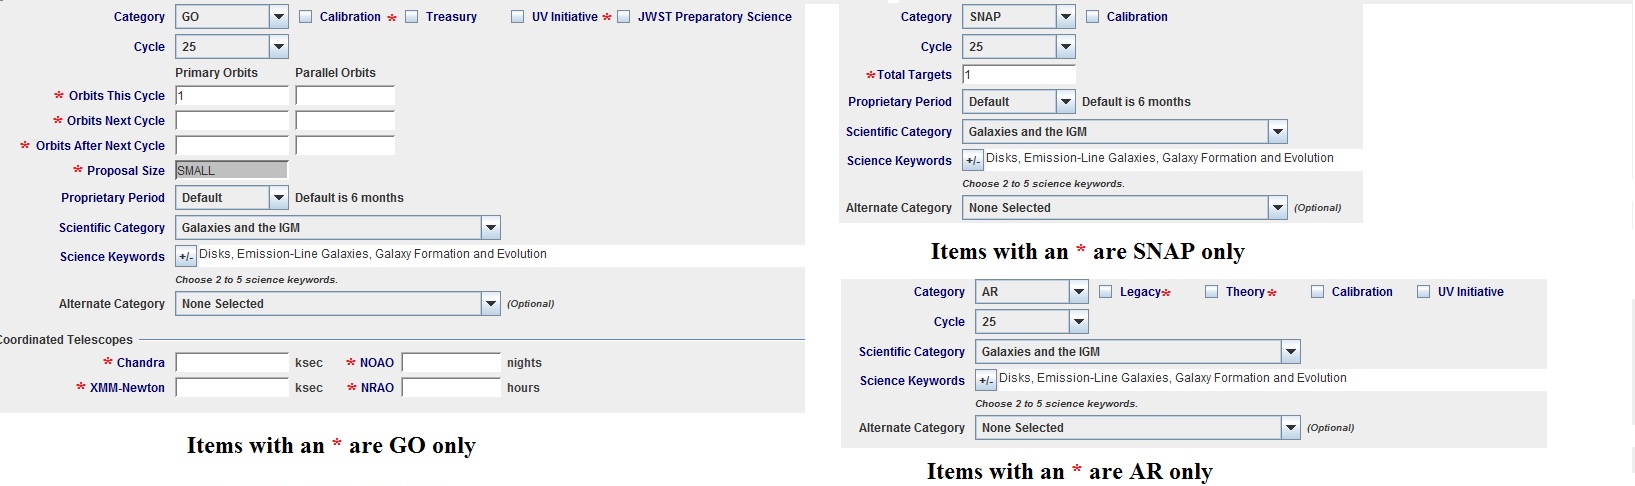
The information about your allocation request varies depending upon
the type of proposal (GO, SNAP, or AR) you are submitting. GO
programs request orbits (for up to 3 cycles), SNAP programs request
targets, and AR programs have no allocation.
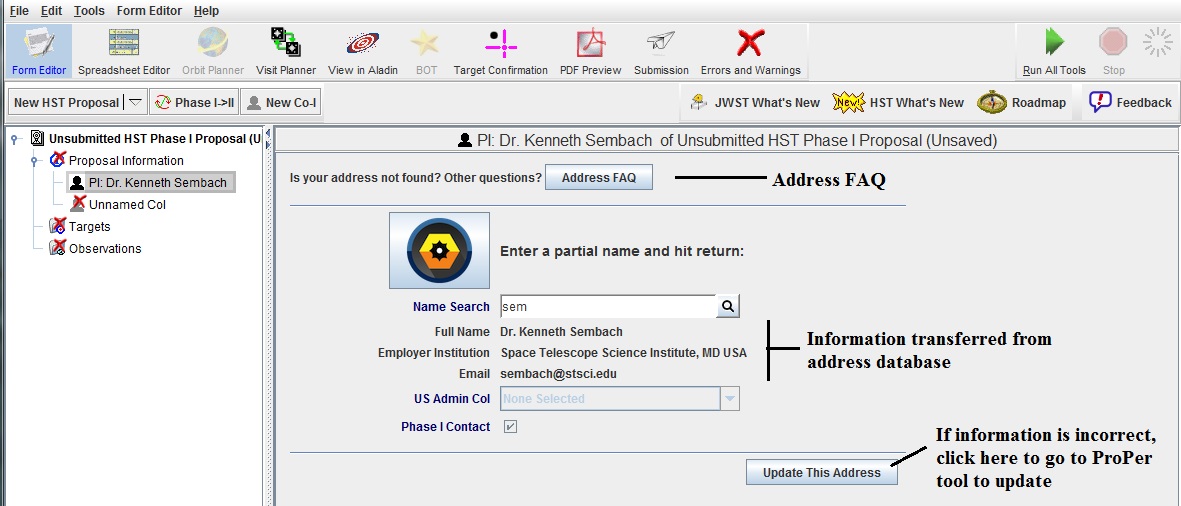
 PI and
  Co-I information.
Click on the navigation button below the form to go to the next form,
the Principal Investigator Form. Alternatively, click on the PI
element in the Tree Editor.
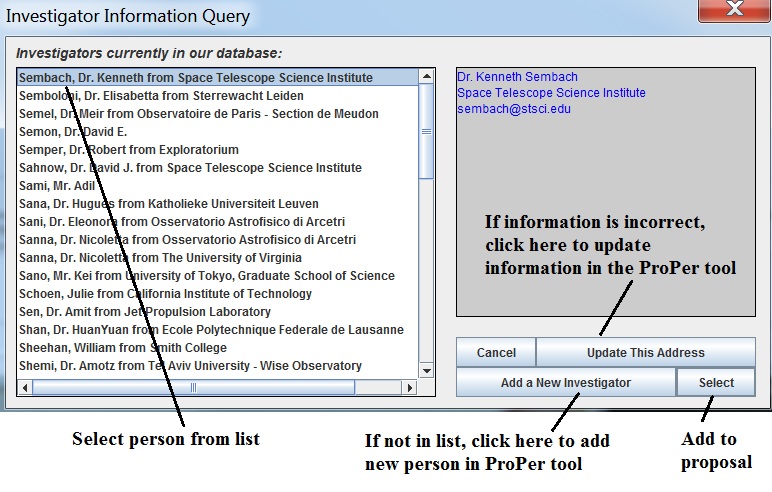
If you are on-line, enter your last name (or the first few characters
of your last name) and either tab or hit return. APT will do an
address lookup from the STScI address database. If you locate your
name, select your record in the Lookup window and hit Select, which will
populate the required address fields. If you are unable to find your
information then hit Add New Address button, which will take you to
the ProPer tool so that you can add the new person to the database.
If you are in the database, but the address information is wrong, then
click on the Update This Address button, which will again take you
to ProPer so you can update the information.
See the address FAQ for more information.
Co-I information.
Click on the navigation button below the form to go to the next form,
the Principal Investigator Form. Alternatively, click on the PI
element in the Tree Editor.
If you are on-line, enter your last name (or the first few characters
of your last name) and either tab or hit return. APT will do an
address lookup from the STScI address database. If you locate your
name, select your record in the Lookup window and hit Select, which will
populate the required address fields. If you are unable to find your
information then hit Add New Address button, which will take you to
the ProPer tool so that you can add the new person to the database.
If you are in the database, but the address information is wrong, then
click on the Update This Address button, which will again take you
to ProPer so you can update the information.
See the address FAQ for more information.
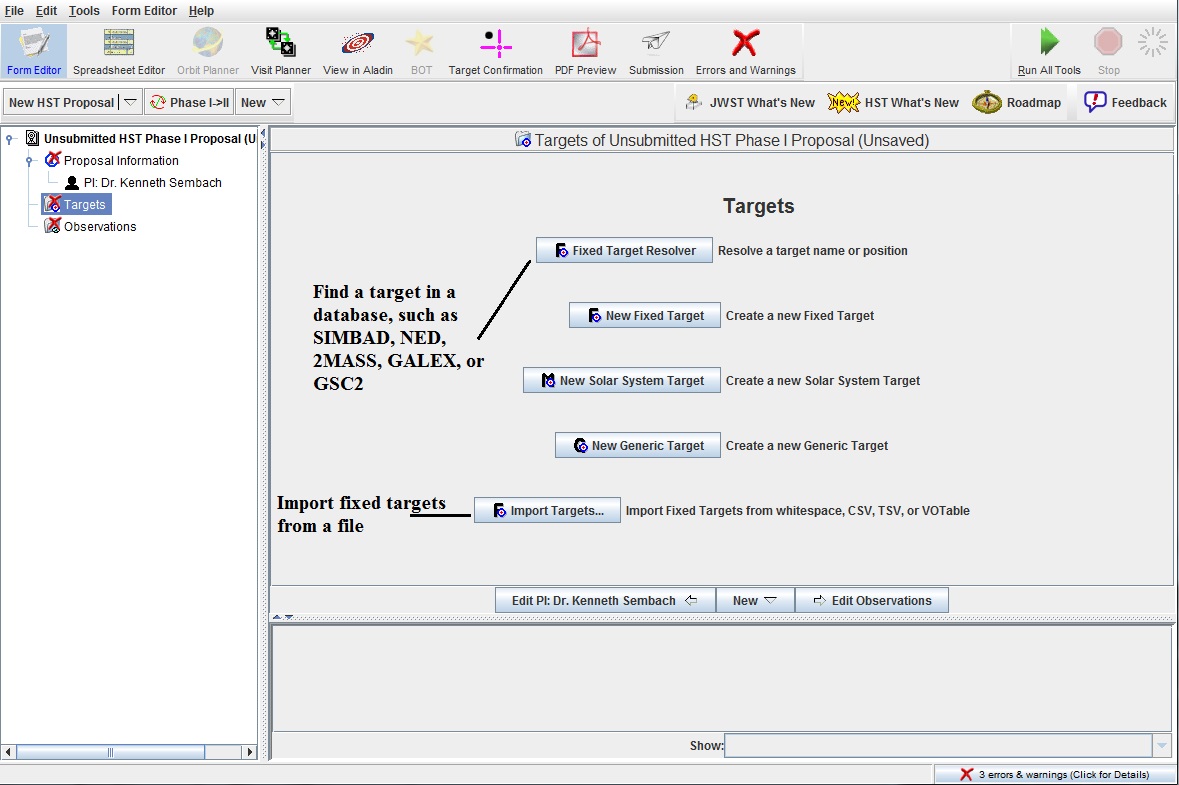
 Targets folder in the Tree
Editor, and click on the type of target you wish to enter
(
Targets folder in the Tree
Editor, and click on the type of target you wish to enter
( Fixed,
 Solar System, or
 Generic).
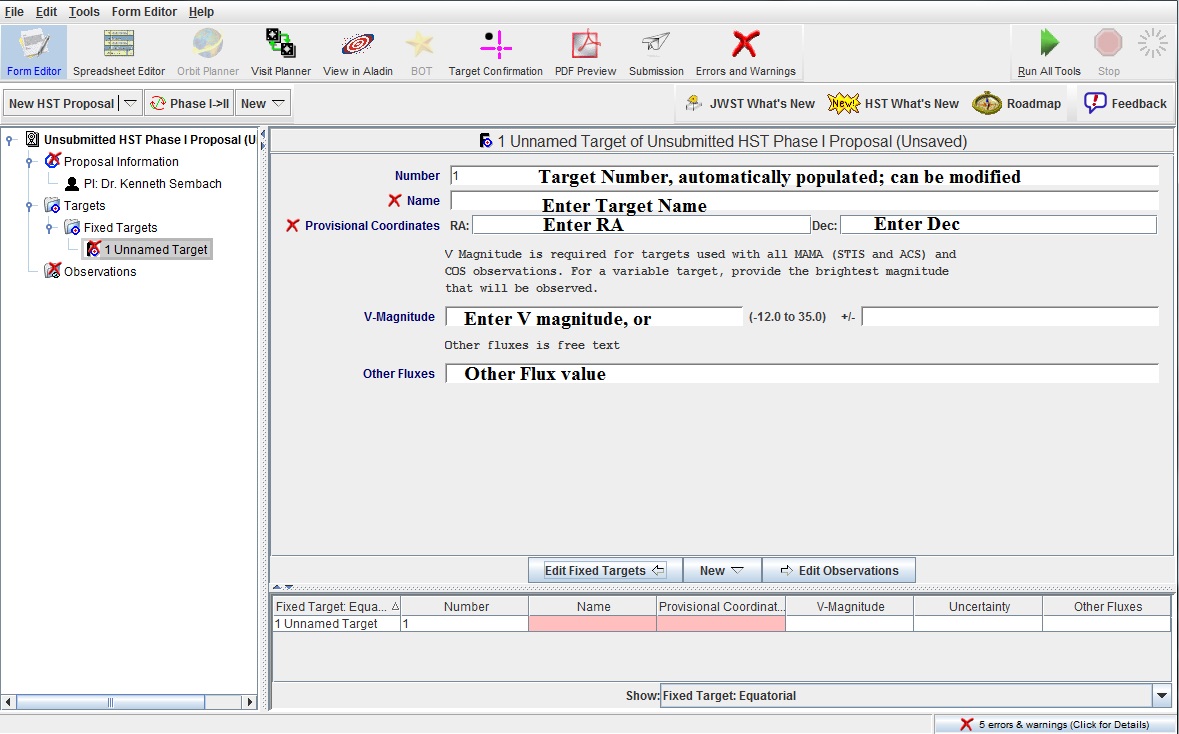
Fill in the appropriate information. Note that there is a Target
Resolver available, and that you can import a
comma-separated list of fixed targets directly into APT;
see How to ingest fixed
targets in Phase I for details.
Generic).
Fill in the appropriate information. Note that there is a Target
Resolver available, and that you can import a
comma-separated list of fixed targets directly into APT;
see How to ingest fixed
targets in Phase I for details.
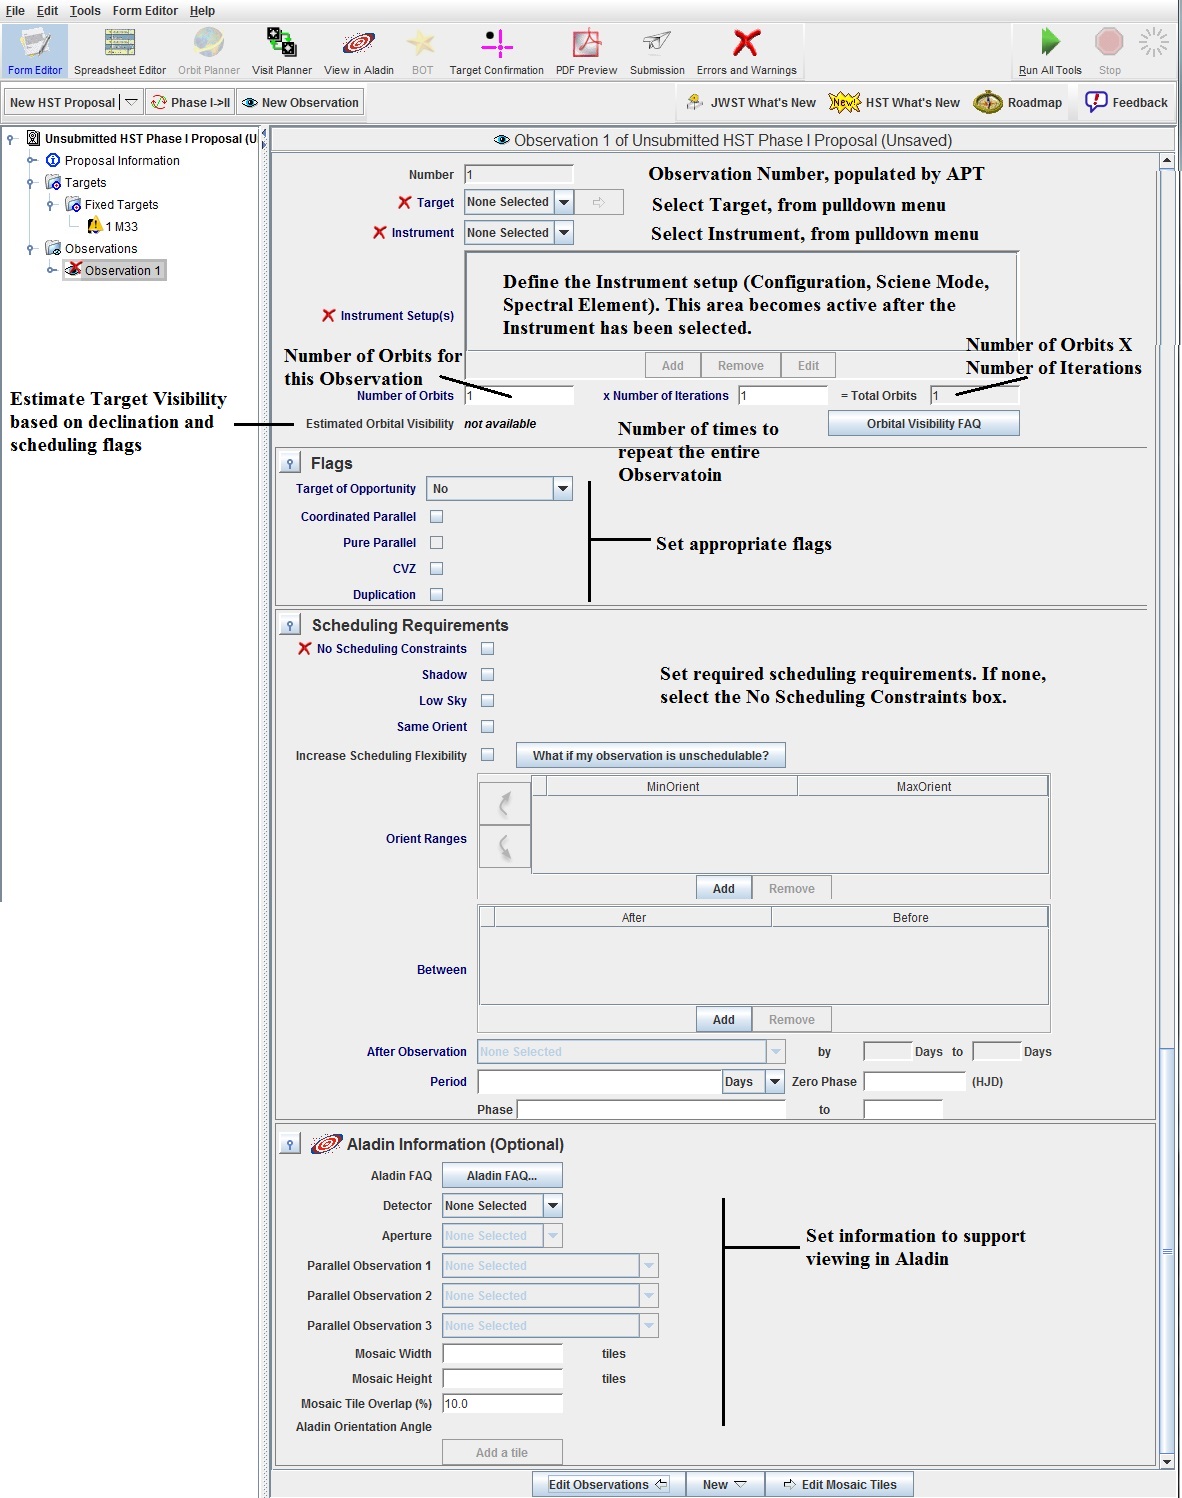
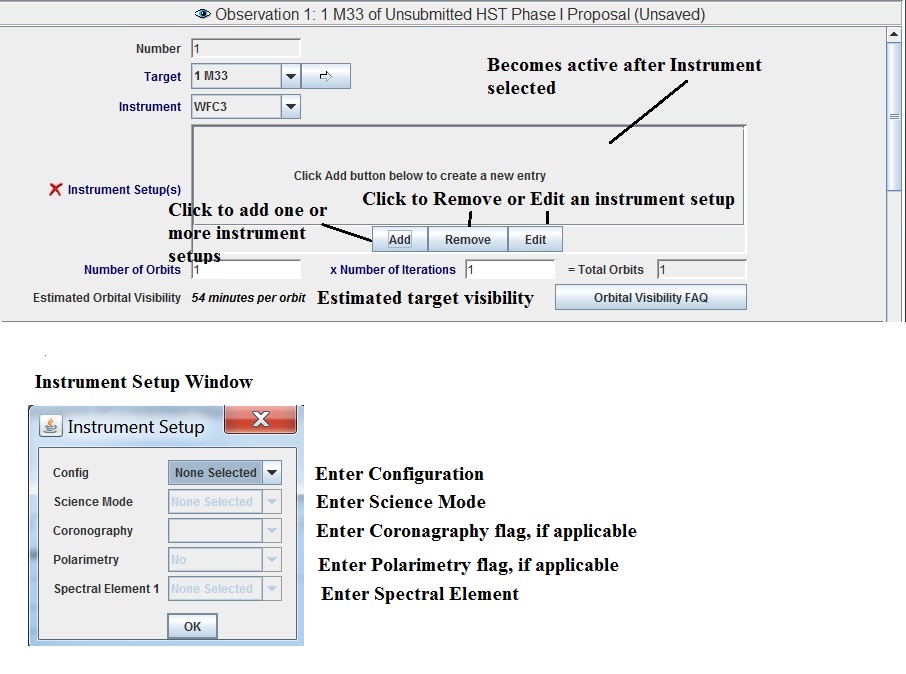
 Observations folder,
and click on the New Observation button to display an
Observations folder,
and click on the New Observation button to display an
 Observation
template. Fill in the required information.
Observation
template. Fill in the required information.
 Observations
until your proposal is complete.
Observations
until your proposal is complete.
 Visit
Planner on fixed target observations. Now run the Visit Planner and adjust
parameters to increase schedulability, if necessary. This step is
particular important for Large programs, or those with tight scheduling
constraints. See the
How to Analyze Scheduling Constraints with APT
document and movie
for more information.
Visit
Planner on fixed target observations. Now run the Visit Planner and adjust
parameters to increase schedulability, if necessary. This step is
particular important for Large programs, or those with tight scheduling
constraints. See the
How to Analyze Scheduling Constraints with APT
document and movie
for more information.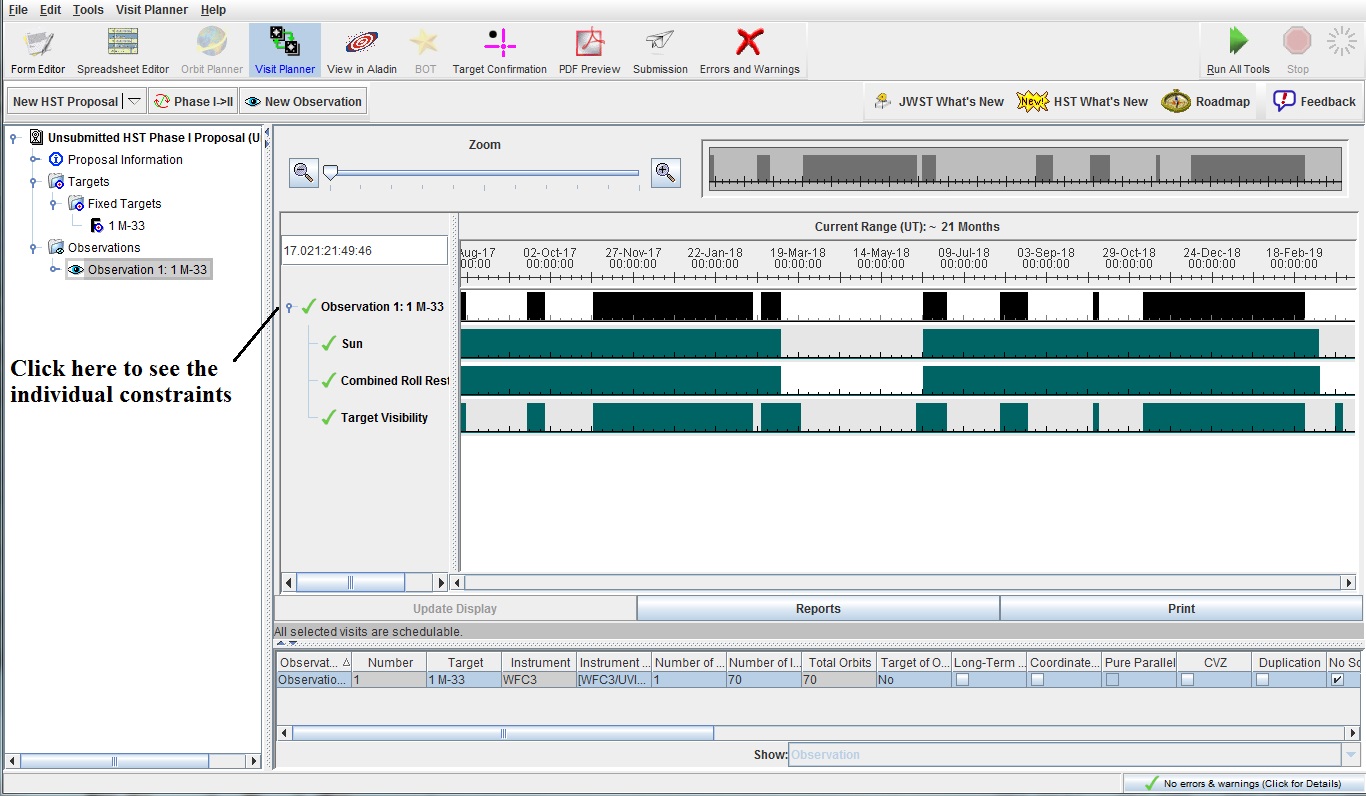
 PDF
Preview tool. This view is what the TAC will be seeing when
they discuss your program, so please review it carefully.
PDF
Preview tool. This view is what the TAC will be seeing when
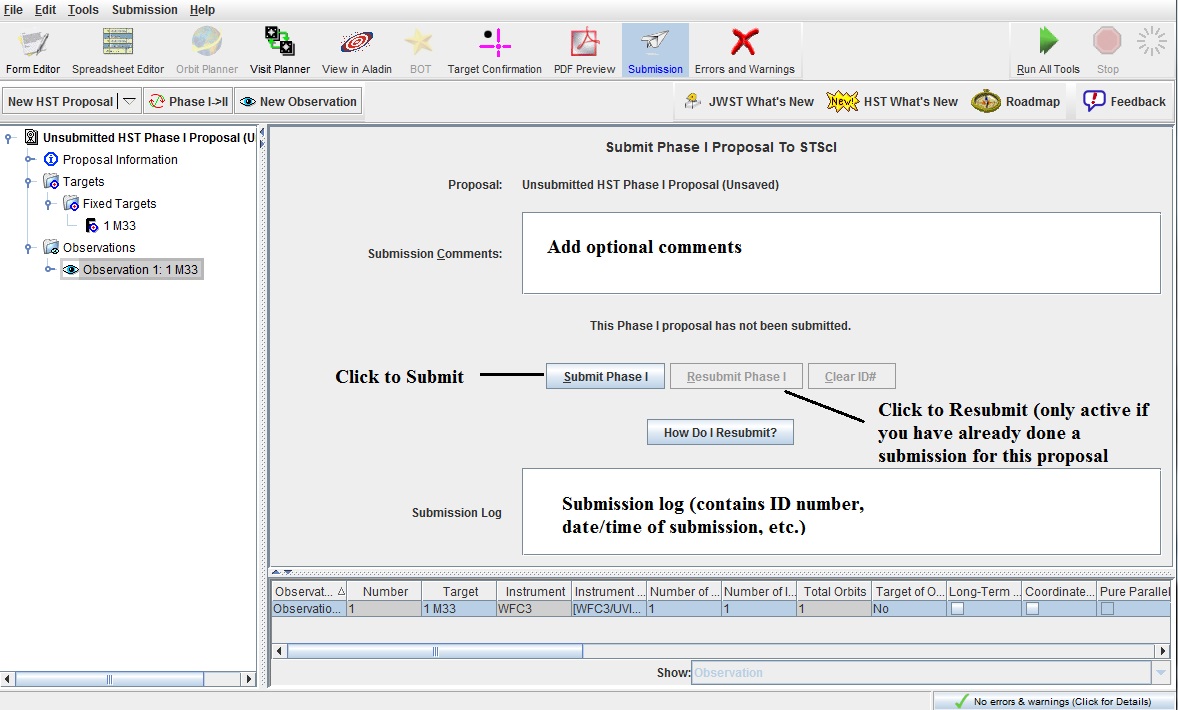
they discuss your program, so please review it carefully. Submission tool. Type
in any comments that you have, and click on the Submit Phase I
button. In the Submission Log window you will see a message giving the
time of the submission, the assigned proposal ID (if a new proposal),
and the submission status.
The PI and all CoIs will receive an automatic email acknowledgment that
the merged PDF submission was received successfully.
Submission tool. Type
in any comments that you have, and click on the Submit Phase I
button. In the Submission Log window you will see a message giving the
time of the submission, the assigned proposal ID (if a new proposal),
and the submission status.
The PI and all CoIs will receive an automatic email acknowledgment that
the merged PDF submission was received successfully.
After the Phase I
deadline has passed, and all submissions are in their final form, you
will receive final notification that your submission has been successfully
processed; this email will mark the completion of the submission. If you
do not receive an acknowledgement within 48 hours of the deadline, please
contact the STScI Help Desk as your submission was NOT RECEIVED and the
Telescope Allocation Committee WILL NOT see your proposal; please provide
the submission ID information from the APT Submission Log window. If there
are any problems associated with your PDF attachment, you will be contacted
by email separately.