Using Aladin with APT in Phase I
 Aladin is the tool
for visualizing observations in APT. Aladin requires apertures to work,
and since those are not part of the normal Phase I submission,
you need to add this information. For a demonstration using a specific
example, see the
training
movie.
Aladin is the tool
for visualizing observations in APT. Aladin requires apertures to work,
and since those are not part of the normal Phase I submission,
you need to add this information. For a demonstration using a specific
example, see the
training
movie.
At the bottom of the Observation
form is an area for Aladin inputs.
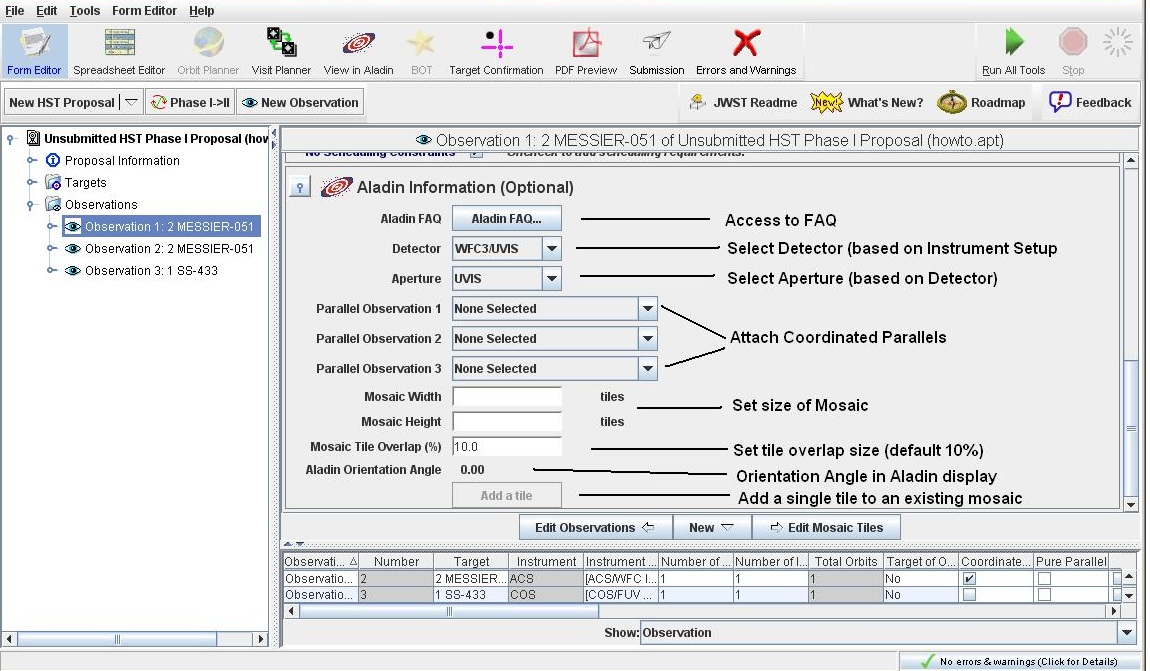
The first item is a picklist for the Detector, and is based on
the Instrument Setup (it defaults to the first detector you
specified). The second item is a picklist for the Aperture, and
is based on the Detector selected. Note that not all possible
apertures are available in order to keep Phase I as simple as
possible (all apertures are available in Phase II). The next items
are used to link any coordinated parallel observations to the
prime observation. Note that if an Observation is defined as
a coordinate parallel (by selecting the Coordinated Parallel flag),
then these fields, as well as the mosaic fields, are not available
for that Observation (since the Prime Observation controls the
Parallel). The next 2 items, as well as the Add Tile button, are
for mosaics only, and are described in that help.
The Aladin Orientation Angle is the aperture orientation shown in
the Aladin display. If we had specified an ORIENT range for the
observation, this value would be initialized to the midpoint of the
range. Since we have not specified an ORIENT, it defaults to 0.
Note that this value is strictly a display value.
If you open the Observation containter, you will see a Mosaic Tiles
folder, which contains Tiles. For non-mosaic observations, there is
only 1 tile.
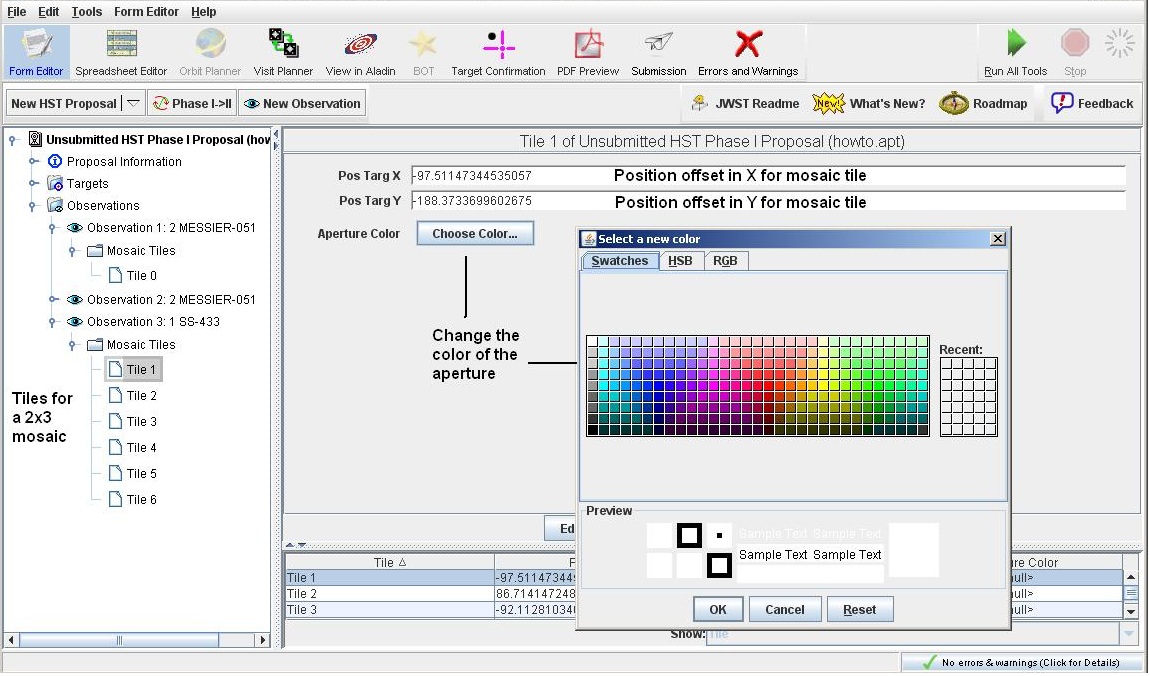
The POS TARG X and Y fields give the offsets for mosaic tiles (and
are not present for non-mosaic observations), while the Aperture
Color allows you to change the plotted color of the aperture.
Select the View in Aladin tool,
which brings up the Aladin window.
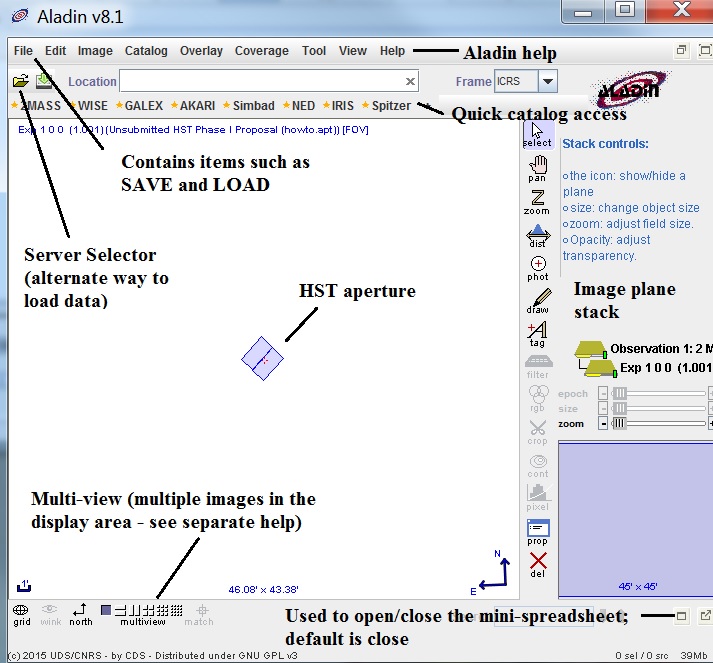
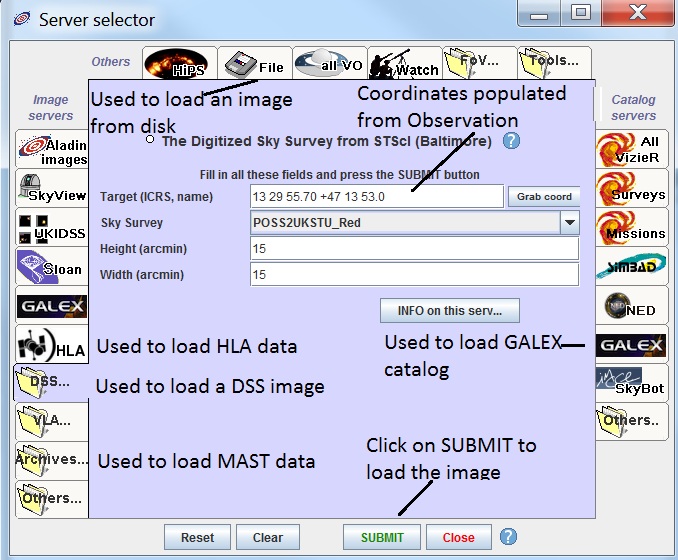
To load a DSS (or other image, such as Hubble Legacy Archive
footprints) image into
Aladin, use either the File Menu or the Server Selector,
and enter the appropriate
information.
Note that the Aladin apertures are semi-transparent. If you
want to adjust the transparency, then use the scroll bar
under the exposure

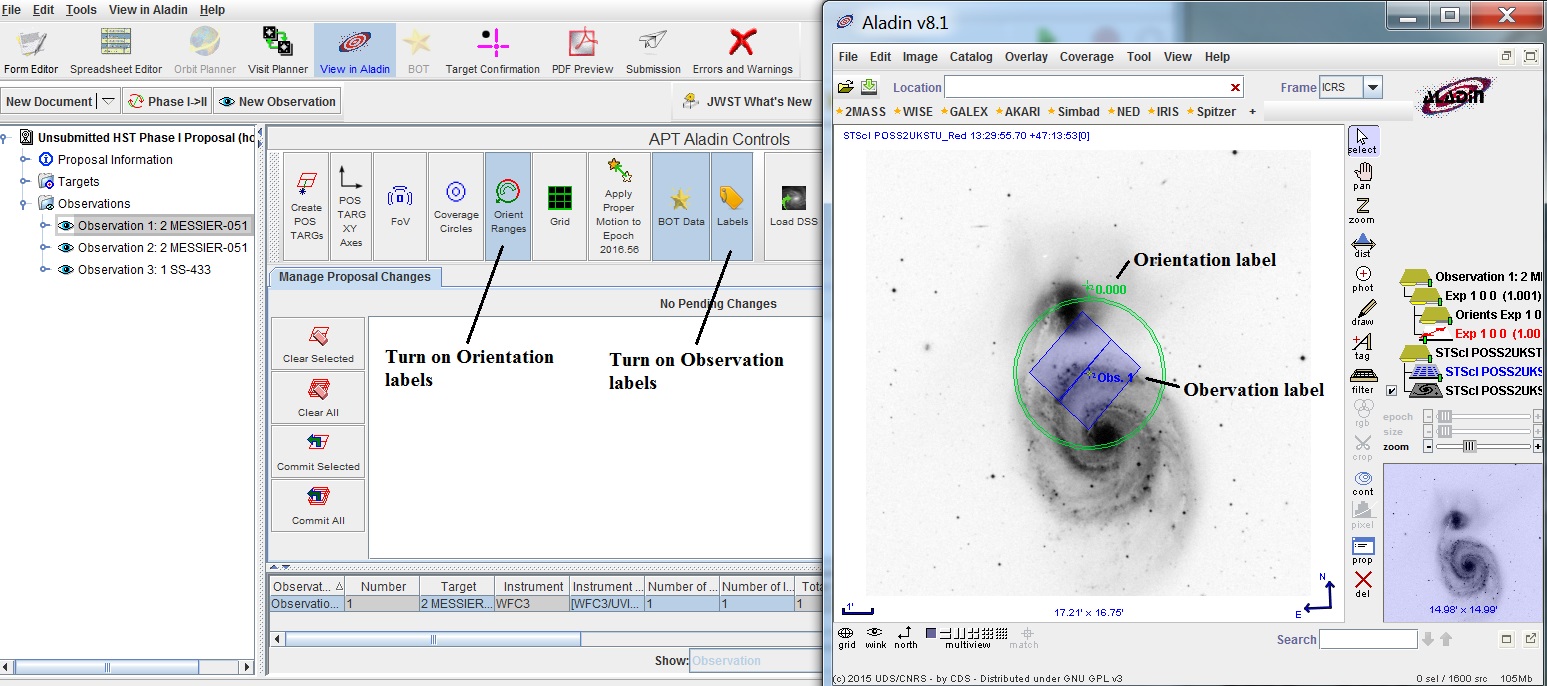
There are labels available for your observations. Select the
Labels button in the APT Aladin window.
If you wish to change the orientation of the aperture, grab the corner of
the aperture (make sure you have the  cursor)
and move the cursor. If you go back to the Observation
in APT, you will see that the Aladin Orientation Angle value has changed.
Note that there is an orientation label available by clicking on the
Orient Range button in the APT Aladin window; this label has the
same value as the Aladin Orientation Angle on the Observation page.
If you want to use this Orientation for your observation, you will need
to go back to the Scheduling Requirements area of the Observation and
input your desired range.
cursor)
and move the cursor. If you go back to the Observation
in APT, you will see that the Aladin Orientation Angle value has changed.
Note that there is an orientation label available by clicking on the
Orient Range button in the APT Aladin window; this label has the
same value as the Aladin Orientation Angle on the Observation page.
If you want to use this Orientation for your observation, you will need
to go back to the Scheduling Requirements area of the Observation and
input your desired range.
You can
change the image scale (Zoom) by either using the scroll bar under
the Aladin Tree, using the Zoom button in the option bar, or
or by clicking in the image where you want the
zooming to be centered and using the mouse wheel (forward to zoom
up, backwards to zoom down).
You can pan around the image by selecting
the Pan function in the option bar.
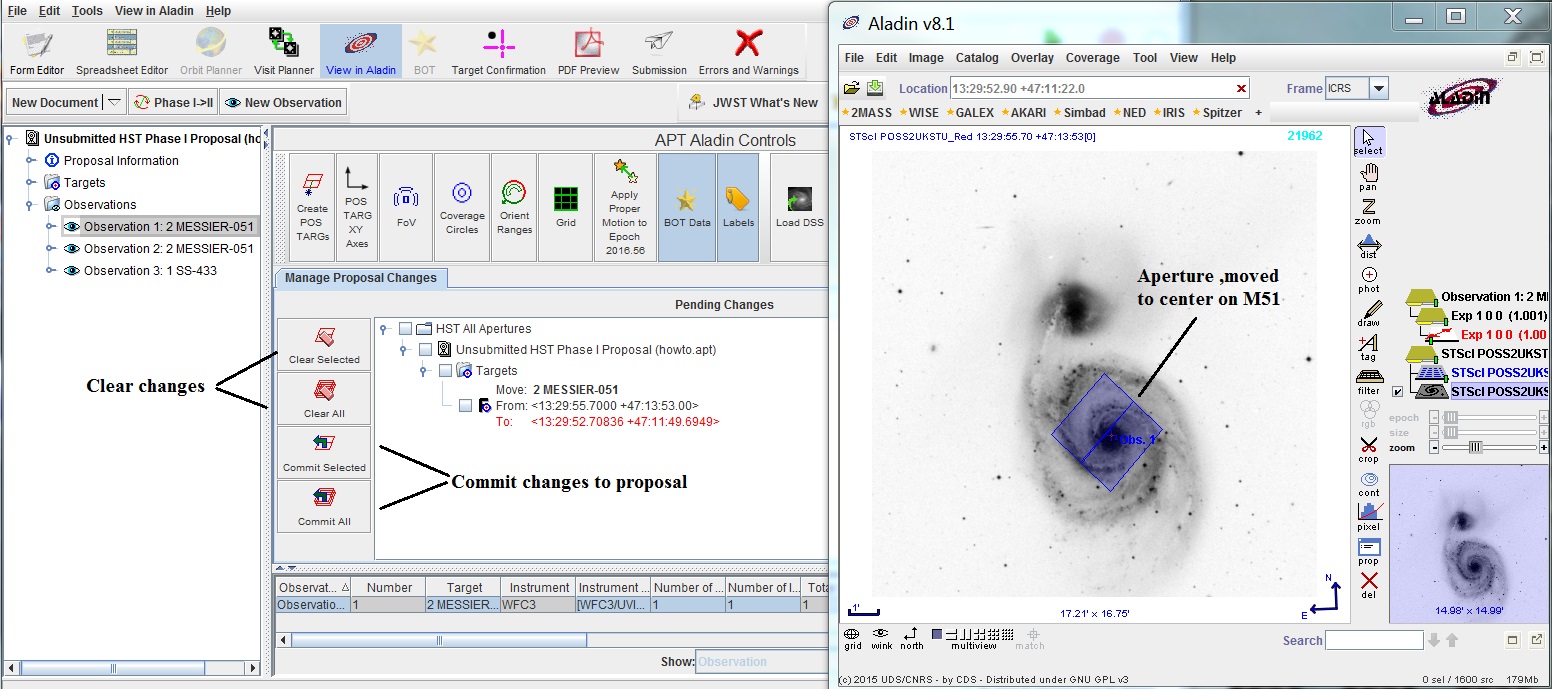
If you wish to adjust the pointing, grab the aperture
(make sure you have the  cursor)
and move it to the desired position. Note that any
changes you make graphically will be reflected in the APT window. You
can then decide to commit the changes to your proposal or clear them.
cursor)
and move it to the desired position. Note that any
changes you make graphically will be reflected in the APT window. You
can then decide to commit the changes to your proposal or clear them.
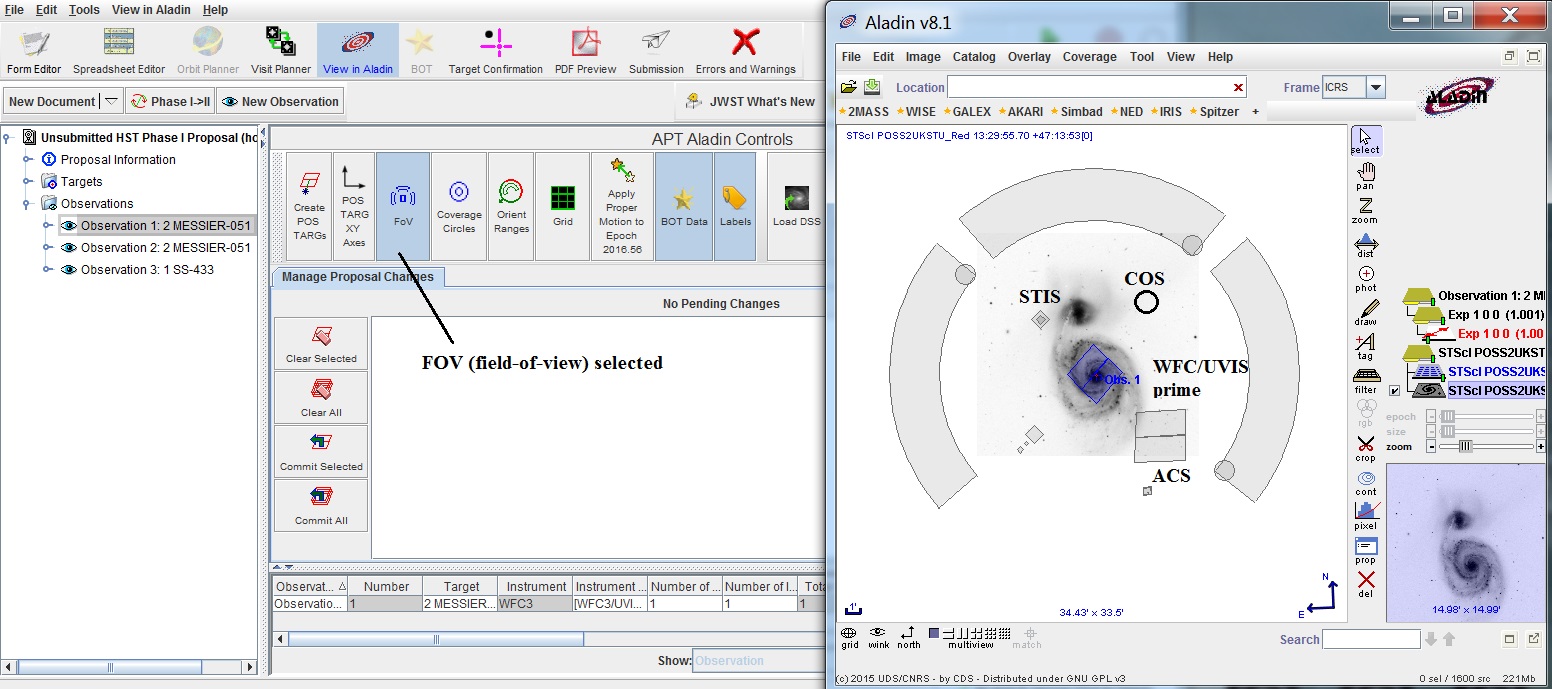
To investigate the utility of a coordinate parallel observation, select
the FOV option in the APT window. You can rotate the primary aperture
to place any object of interest in a parallel aperture.
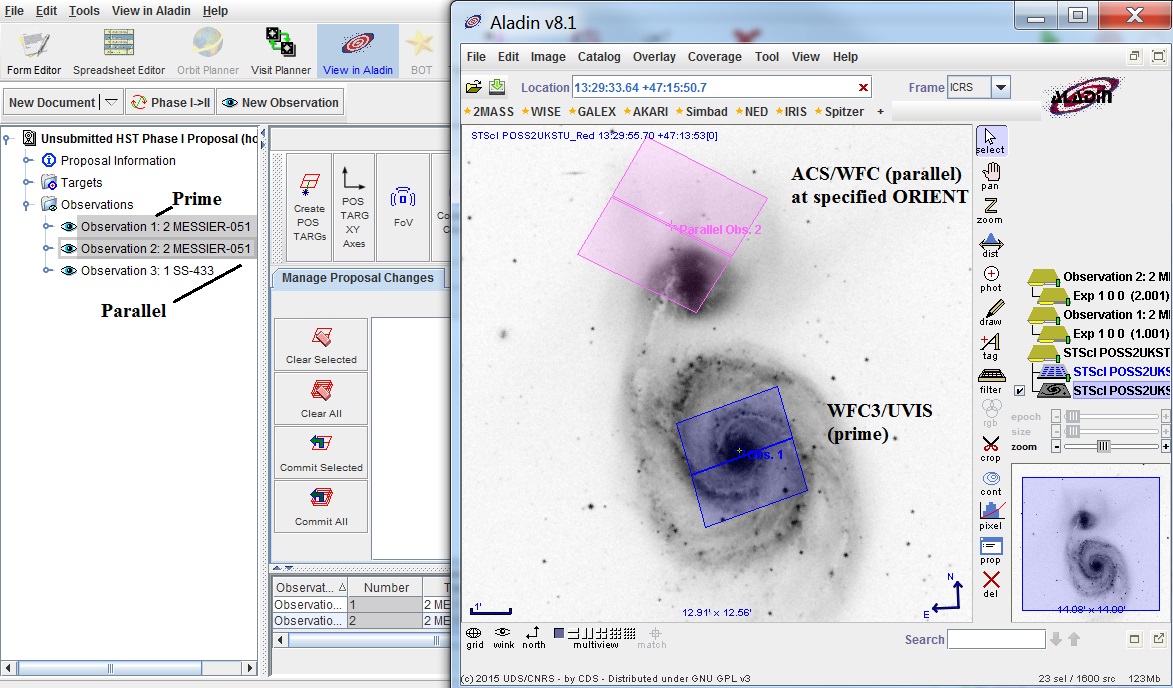
If you already have a coordinated parallel observation specified in
your proposal (by selecting the Coordinate Parallel flag on the
Observation and linking the Parallel to the Prime), you can display
both observations by selecting both in the APT Tree Editor.
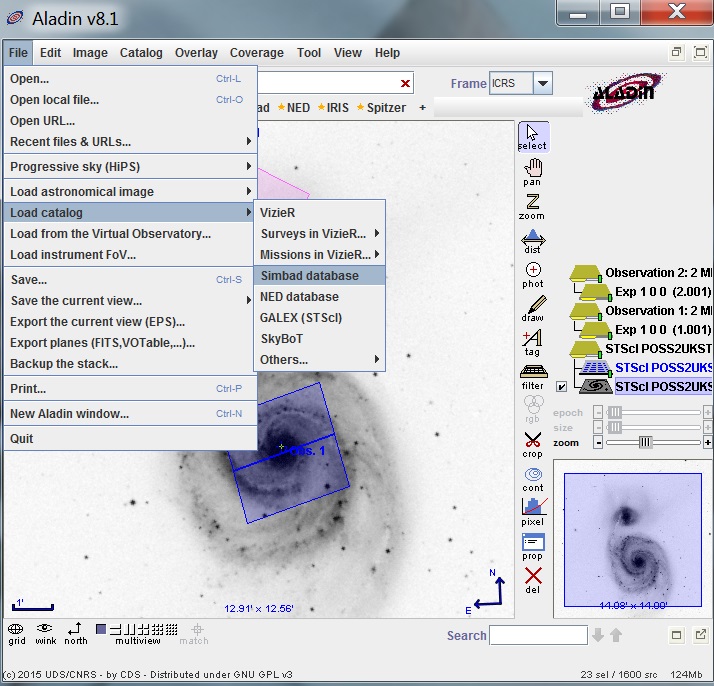
You can also overlay catalogs on the image. Click on the File/Load
Catalog (or use the Server Selector or the quick load),
and select the desired catalog (e.g. SIMBAD) and submit the
catalog query.
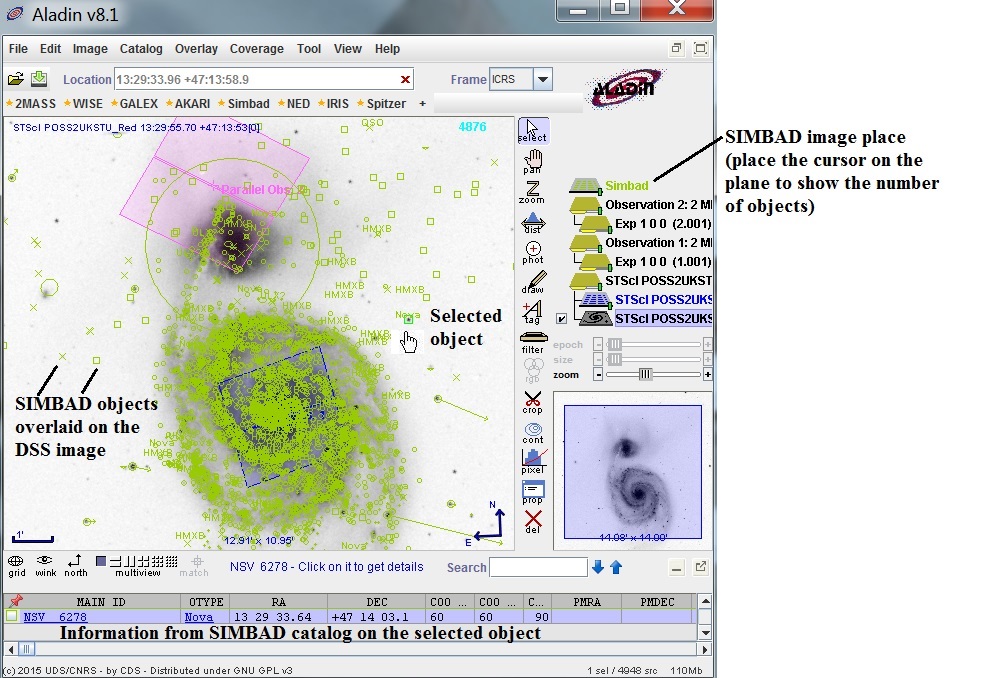
You can get information on the objects in the catalog by placing your
cursor on the object and clicking - information from the catalog will
be displayed in the mini-spreadsheet at the bottom of the Aladin
window; the spreadsheet is closed by default, but will open
automatically when you select an object.
Note that if you have multiple catalogs displayed, and an
object appears in both, clicking on that object will display the
information from all catalogs. Note that if you have 2 different catalogs
for a single objects, the columns shown in the Aladin data area are
appropriate for the first catalog listed. However, if you put your cursor
in a column for the second catalog, you can see the correct column headers.
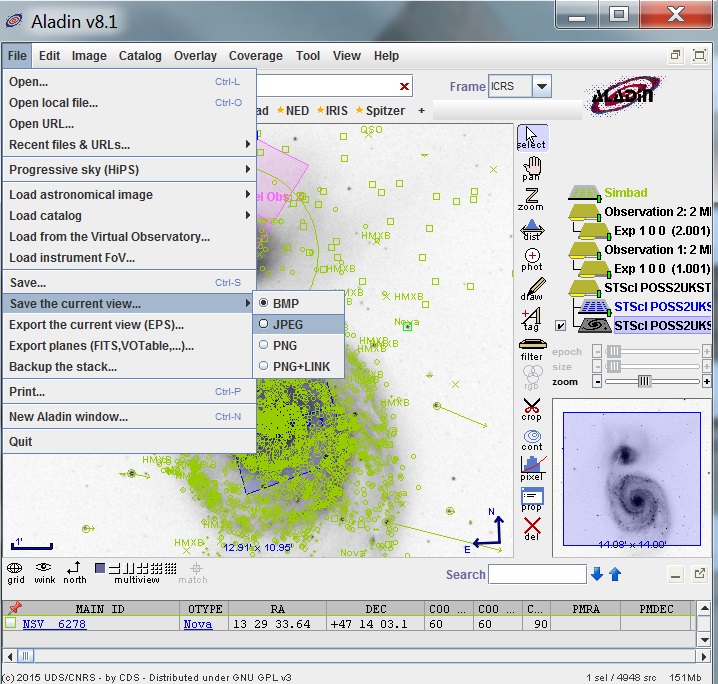
If you want to save a copy of the image for inclusion in your PDF
attachment, select the Save option in Aladin. The Save Current View
will save the image in a format that can be used in your PDF attachment.
Last modified: January 25, 2016.