CREATING AND USING PATTERNS
Overview
This document describes how to create and use patterns; see the
training movie.
To create and use a pattern takes 2 steps. First, you create a
pattern template, which will be applied to an exposure.
Second, you create a
 Pattern container that holds the exposures to be executed
at each pattern point. Note that when using the Text file for your
proposal, you need to use the PATTERN special requirement to tie the
exposures together.
Pattern container that holds the exposures to be executed
at each pattern point. Note that when using the Text file for your
proposal, you need to use the PATTERN special requirement to tie the
exposures together.
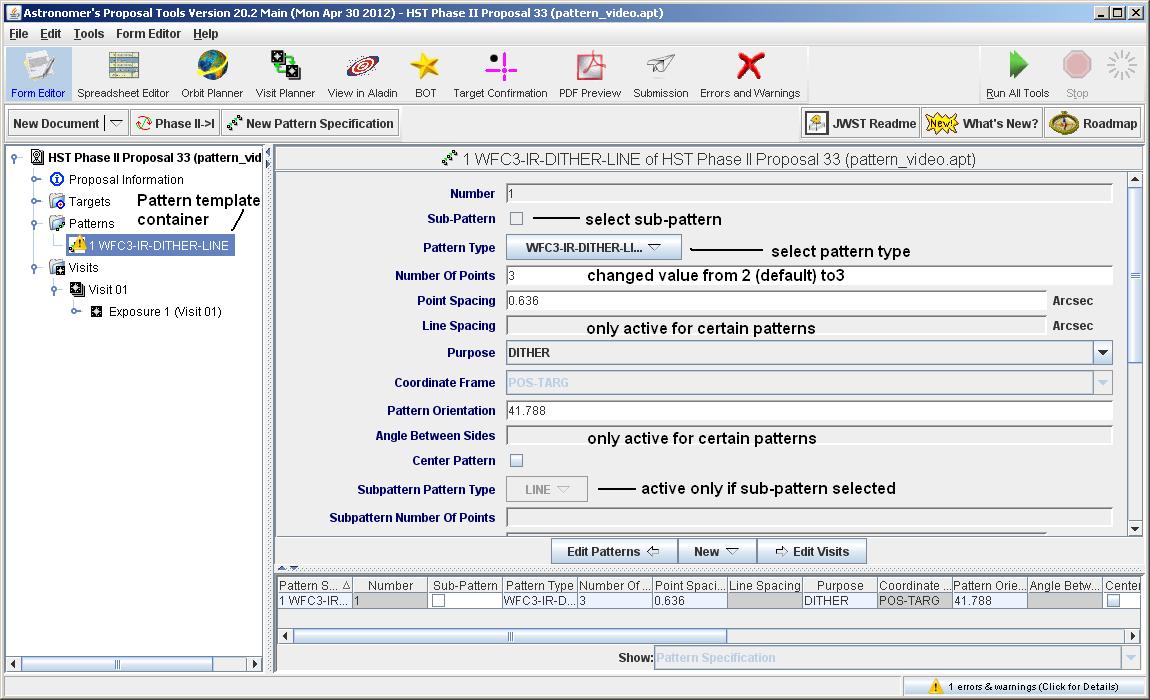
Defining the template
To define the pattern template, set the context to the
 Pattern
icon in the Tree editor. Next, click on the Select
New
Pattern Specification button, and select the pattern desired.
Note that some patterns (e.g. LINE) allow sub-patterns to be
selected (click in sub-pattern box), while most patterns have
some items that are editable.
Pattern
icon in the Tree editor. Next, click on the Select
New
Pattern Specification button, and select the pattern desired.
Note that some patterns (e.g. LINE) allow sub-patterns to be
selected (click in sub-pattern box), while most patterns have
some items that are editable.
Using the template
Now that Pattern template is defined, it needs to be applied to
an exposure(s). To create a
Pattern
container, set the context
to either the
 Visit
or an
Visit
or an
 exposure in the visit. Click on the
New Pattern button under the tool-bar, and a
Pattern container will be created in the visit. Select the pattern template
that is appropriate.
exposure in the visit. Click on the
New Pattern button under the tool-bar, and a
Pattern container will be created in the visit. Select the pattern template
that is appropriate.
To place an
exposure in the
Pattern container, either click on
the New/New Exposure button under the tool-bar (with the
Pattern
container in context), or drag an existing exposure into the
container. At this point, you will note that the
Pattern
container has a key on the left, which when opened reveals
the exposure. Also note that the title of the container has
been modified to include the exposure number of the exposure(s)
it contains.
Looking at the results
With the visit specified, run the
 Orbit Planner to examine the results;
see separate documentation
and
movie
on the Orbit Planner.
Orbit Planner to examine the results;
see separate documentation
and
movie
on the Orbit Planner.
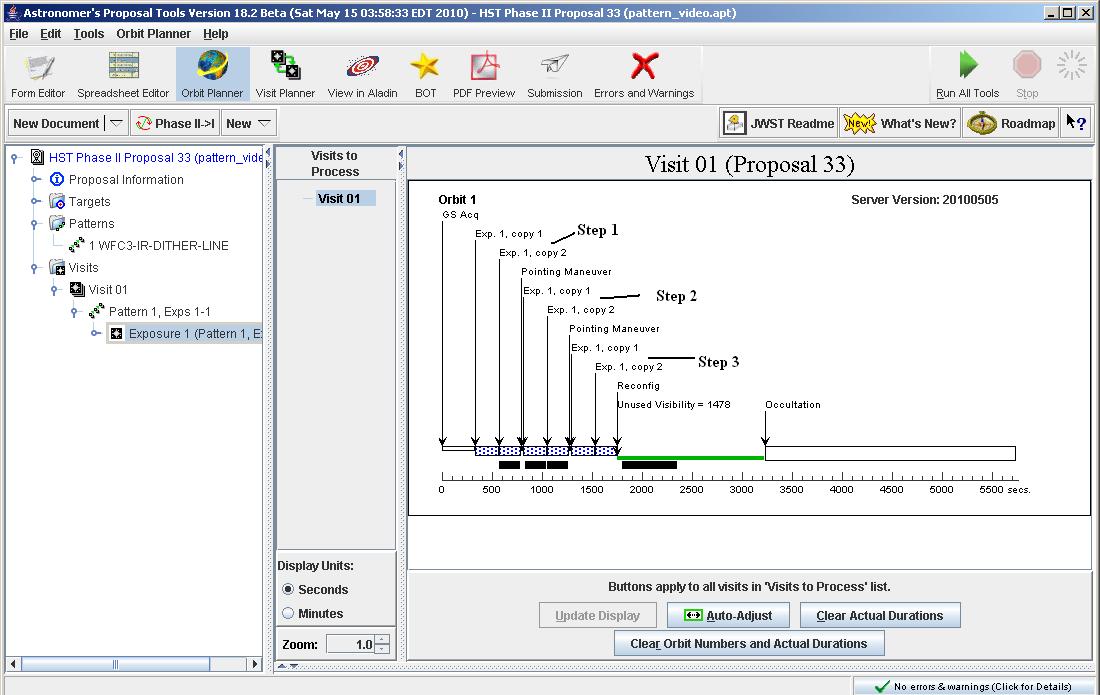
In this example, an 3-step pattern was selected. The instrument used
was the WFC3/IR, which means that we get 2 exposures
at each point in the pattern because we specify a number of iterations of 2.
The pattern points are separated by
pointing maneuvers.
If a second exposure at each pattern point is
desired, a new exposure is added to the
Pattern container. With the
context set to Pattern 1-1 or Exposure 1 in the container, click on
the New/New Exposure button. The diagnostics are due to the new exposure
not being filled in, as well as the unassigned orbit numbers; see
separate documentation and
movie
on orbit numbers.
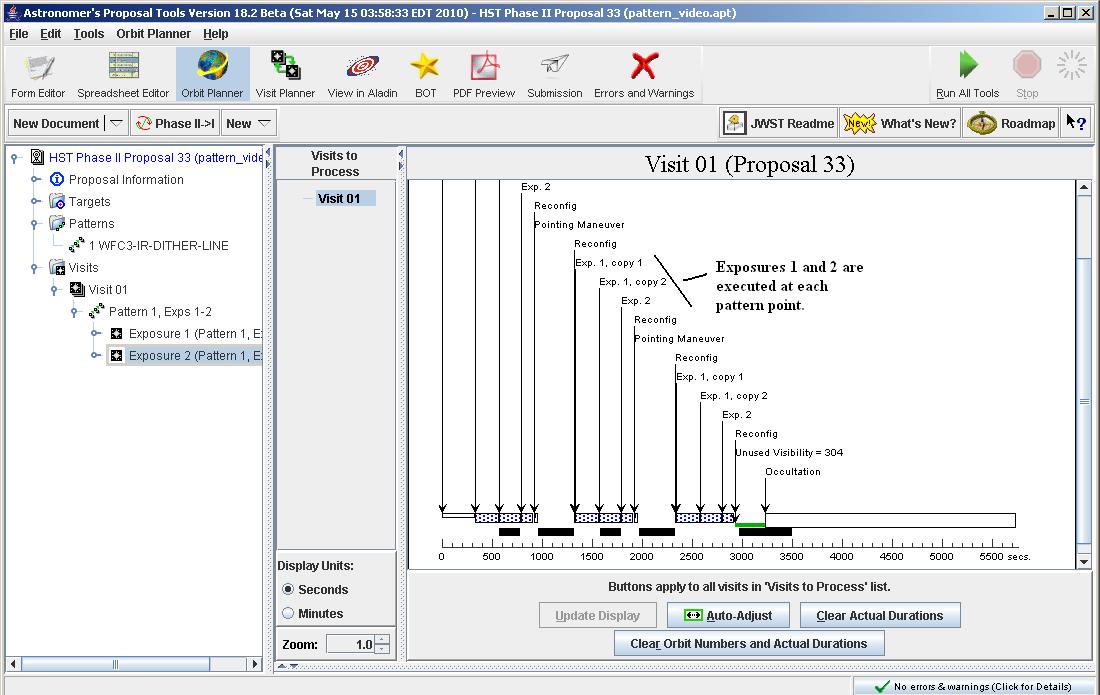
Note that there are now 2 exposures executing at each pattern point.
If the first exposure was to complete its pattern, followed by a
second exposure doing a complete pattern, then each exposure would be
in its own
Pattern container.
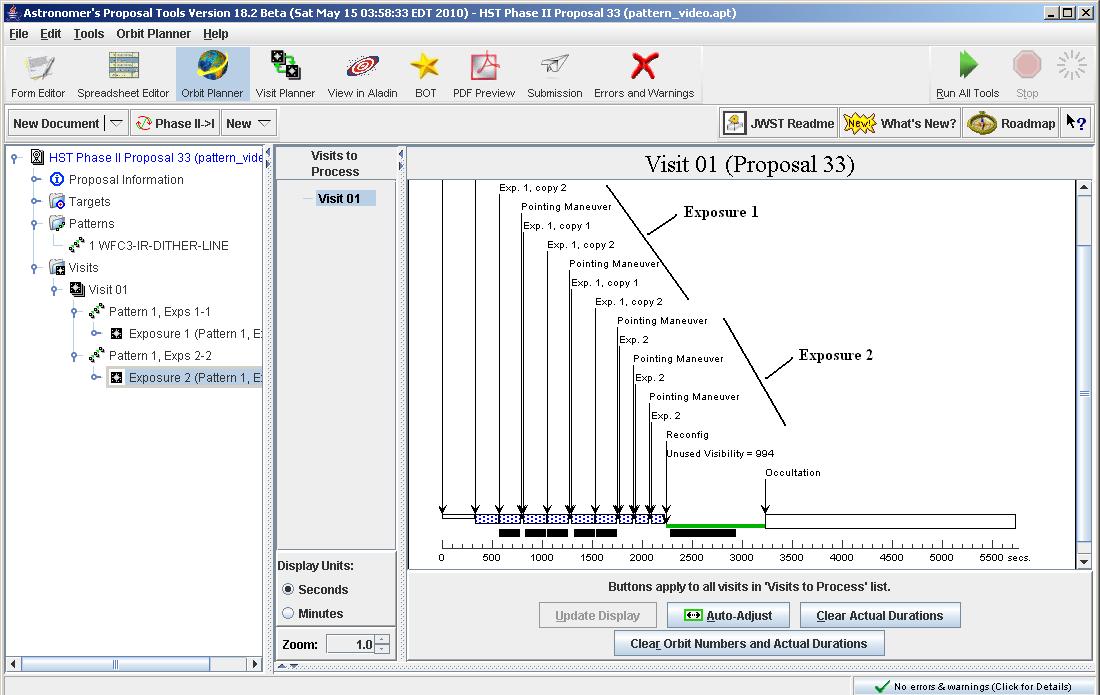
Note that exposure 1 now completes its pattern, then exposure 2
does the same.
Note that you can put coordinated parallel observations on the pattern
points by inserting a
 Prime+Parallel group inside the
Pattern container.
Prime+Parallel group inside the
Pattern container.
Last modified: May 13, 2014.