To get more information (tooltip), put your cursor on the
 .
.
To get a pastable version of the tooptips, click on the
.
(Unfortunately these do not work with Safari or Omniweb browsers.)

Hierarchical (Tree) Editor
Along the left side of the user
interface is a window which provides a view of the proposal similar to
a tree format file browser used in graphical interfaces such as
Windows Explorer and Mac Finder. Within
this area you can view, create, delete, and copy elements of proposals
(e.g., observations). Items listed in the Hierachical Editor that are
incompletely or improperly specified are marked with a red x. You can
expand the hierarchy by clicking on the key symbol just to the left of
the element name (which will now point vertically). You specify the
proposal element to be edited (in the Form or Spreadsheet Editors) by
clicking on the element name (which then becomes highlighted). Some
tools, such as the Spreadsheet Editors, allow more than one proposal
element to be selected for editing. This selection is accomplished by
holding down the Control key and clicking on desired items. Contiguous
items can be selected by clicking on the first item and then by
holding down the Shift key and clicking on last item; see the movie on
GUI editting tips for more on using the Tree Editor.
Mini-Spreadsheet
Along the bottom of the interface is an
editor which displays the details of the proposal element selected for
editing in the Hierarchical Editor. It provides a convenient means for
editing properties of proposal elements while the output of another
tool is visible. For example, you can edit an exposure time in the
Mini-Spreadsheet while the Orbit Planner output is visible. This tool
may not be visible to you when you start the APT and can be made
visible by dragging the bottom border of the tool display area
upwards. The information in the Mini-Spreadsheet can generally be
edited directly by clicking on the desired field, although in some
cases a window will pop up to allow entry of information (e.g., if the
field can contain a large amount of text, such as the abstract). The
Mini-Spreadsheet marks improper items by red highlighting. Note that
you can change the order of the columns by placing the cursor on the
column title and dragging the entry, and the size of the columns by
placing the cursor on the right-hand boundary and dragging. A single
click on the column title will enable a sort mode for the column;
subsequent clicks will sort in ascending and descending order.
Back Navigation
The back navigation button will take you one item backwards in the
proposal tree (e.g. from the CoI page to the PI page).
New Entity - Navigation Bar
This button adds a template for a new entity in your proposal that can
be edited. The exact set of entities you can create depends on what is
being edited.
Forward Navigation
The forward navigation button will take you one item forwards in the
proposal tree (e.g. from the PI page to the CoI page).
Roadmap Link
This button provides a link to the Roadmap web page. This page gives
a step-by-step guide to writing, processing and submitting your
proposal, along with links to the relevant documentation for each
step.
Processing Wheel
When active, the spinning wheel shows that processing is on-going.
Stop Processing
This option will halt processing of the Orbit Planner (HST Phase II only).
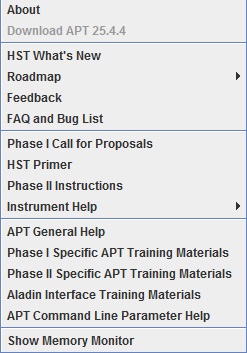
HST What's New
This button provides a description of major new features or changes for the cycle.
Run All Tools
This option will process all visits, or
selected visits, through the Orbit Planner and Visit Planner in a
batch mode (HST Phase II only).
Phase I to Phase II conversion
For HST only. This tool allows you to
switch back and forth between the Phase I and Phase II proposal
format. When you initially go from Phase I to Phase II, certain fields
are automatically populated in the blank Phase II template (e.g. Title,
abstract, investigators). You are also given the option of copying your
Phase I coordinates, although the accuracy required in Phase II is
substantially greater than that required in Phase I. Therefore, you
many need to update your coordinates prior to submitting your Phase II.
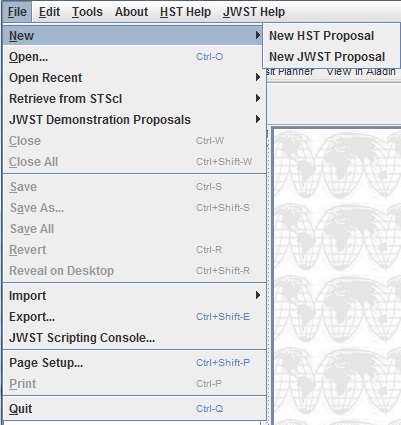
New Document
This pulldown will create a new document (proposal). Use
this only if you are beginning a new proposal. You should not need to
use this tool in HST Phase II, since you will start with your existing
HST Phase I proposal.
Spreadsheet Editor
An alternate editing tool, which
presents data on multiple proposal elements in a tabular format.
Orbit Planner
This tool is used to plan each orbit's
activities. The tool checks and displays the structure of each orbit
in the visit (HST Phase II only; see movie).
Visit Planner
This tool is used to check the schedulability of each visit.
The tool checks and displays constraints on a
proposal, and calculates observing windows (see movie).
Bright Object Tool
For HST only. This tool is used to check for any field objects that are too bright
to be safely observed by the ACS/SBC, STIS/MAMAs, or COS detectors. It can also be used to
check for field objects (for all detectors) that could impact the science
quality of the data (e.g. objects that could saturate, bleed, etc.). Use
of this tool is not mandatory, but is good sanity check. Note that there
is a movie describing how to use the tool.
View in Aladin Tool
This tool displays exposure apertures against an image
of the sky. It is useful for target and/or coordinate
confirmation, confirmation, orientation determination, and mosaic creation.
Use of this tool is not mandatory, but
is good sanity check.
Note that there is a
movie describing how to use the tool.
PDF Preview
This tool provides a view of the
proposal in PDF format. For HST Phase I and JWST, the PDF is a combination
of the information entered into APT and the attached scientific
justification. In HST Phase II, the PDF is a combination of an exposure
summary and the Orbit Planner graphical output.
Errors and Warnings Report
This tool presents a list of errors or warnings for the proposal (see movie).
Submit Tool
This tool sends the proposal (and associated files if appropriate) to STScI after full processing.
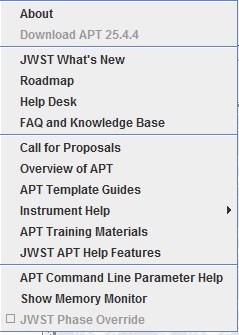
JWST What's New
This button provides a description of major new features or changes for the cycle.
Diagnostics Area
This area displays the number of current
diagnotics. By clicking on this region, you will get the Diagnostics
Browser, which provides a detailed description of all errors and warnings in
the proposal.
Context-sensitive Help
When active (blue), click on a parameter in the Form Editor and the appropriate section in the Call for
Proposals, Primer, or Phase II Instructions for HST, or in a JDox article for JWST
will be displayed. For manuals and more general information, click
on the Help menu.
Confirmation Charts
This tool is used to generate target confirmation charts for fixed targets. The position of the object
is indicated on a DSS image (with proper motion taken into account, when provided).
These charts should be used to verify your target coordinates.
Help Menu
The JWST Help menu provides access to documents
relevant to JWST proposal preparation (these include the Call for
Proposals, APT Template Guides, and Instrument help).
Feedback
This presents a popup in which you can provide feedback about APT. Please select the option to attach
the loaded proposal if the feedback would make more sense in the context of your proposal.
Open ETC
This button will open a browser window on the JWST ETC homepage.
Last modified: March 16, 2018.
 .
.