First we need to determine the position angle for the mosaic; note
that for most mosaics, you will need to specify an exact position angle
(the exception is for rotationally symmetric regions with no guide star
issues).
The default position angle for the Aladin display is V3PA=0; for more on
assigning position angles, see Assigning Position Angles for JWST
Observations
(document).
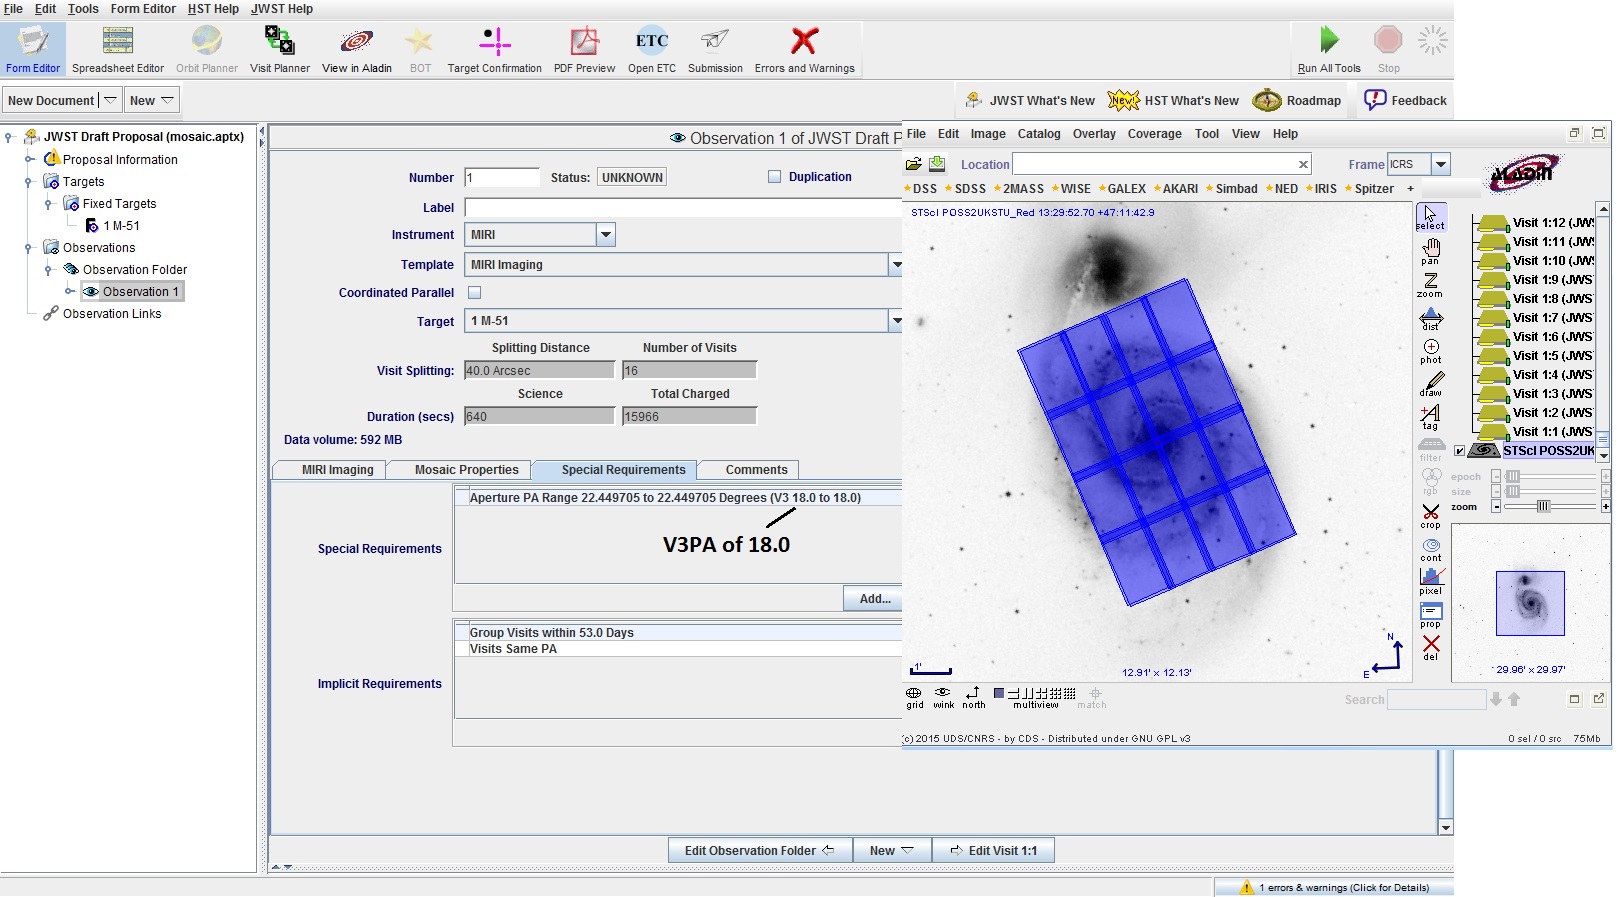
If we rotate the mosaic, we see the a V3PA of 18 gives better
coverage. Note that when you rotate a single aperture in a mosaic, all
the other apertures move to catch up when you finish the rotation.
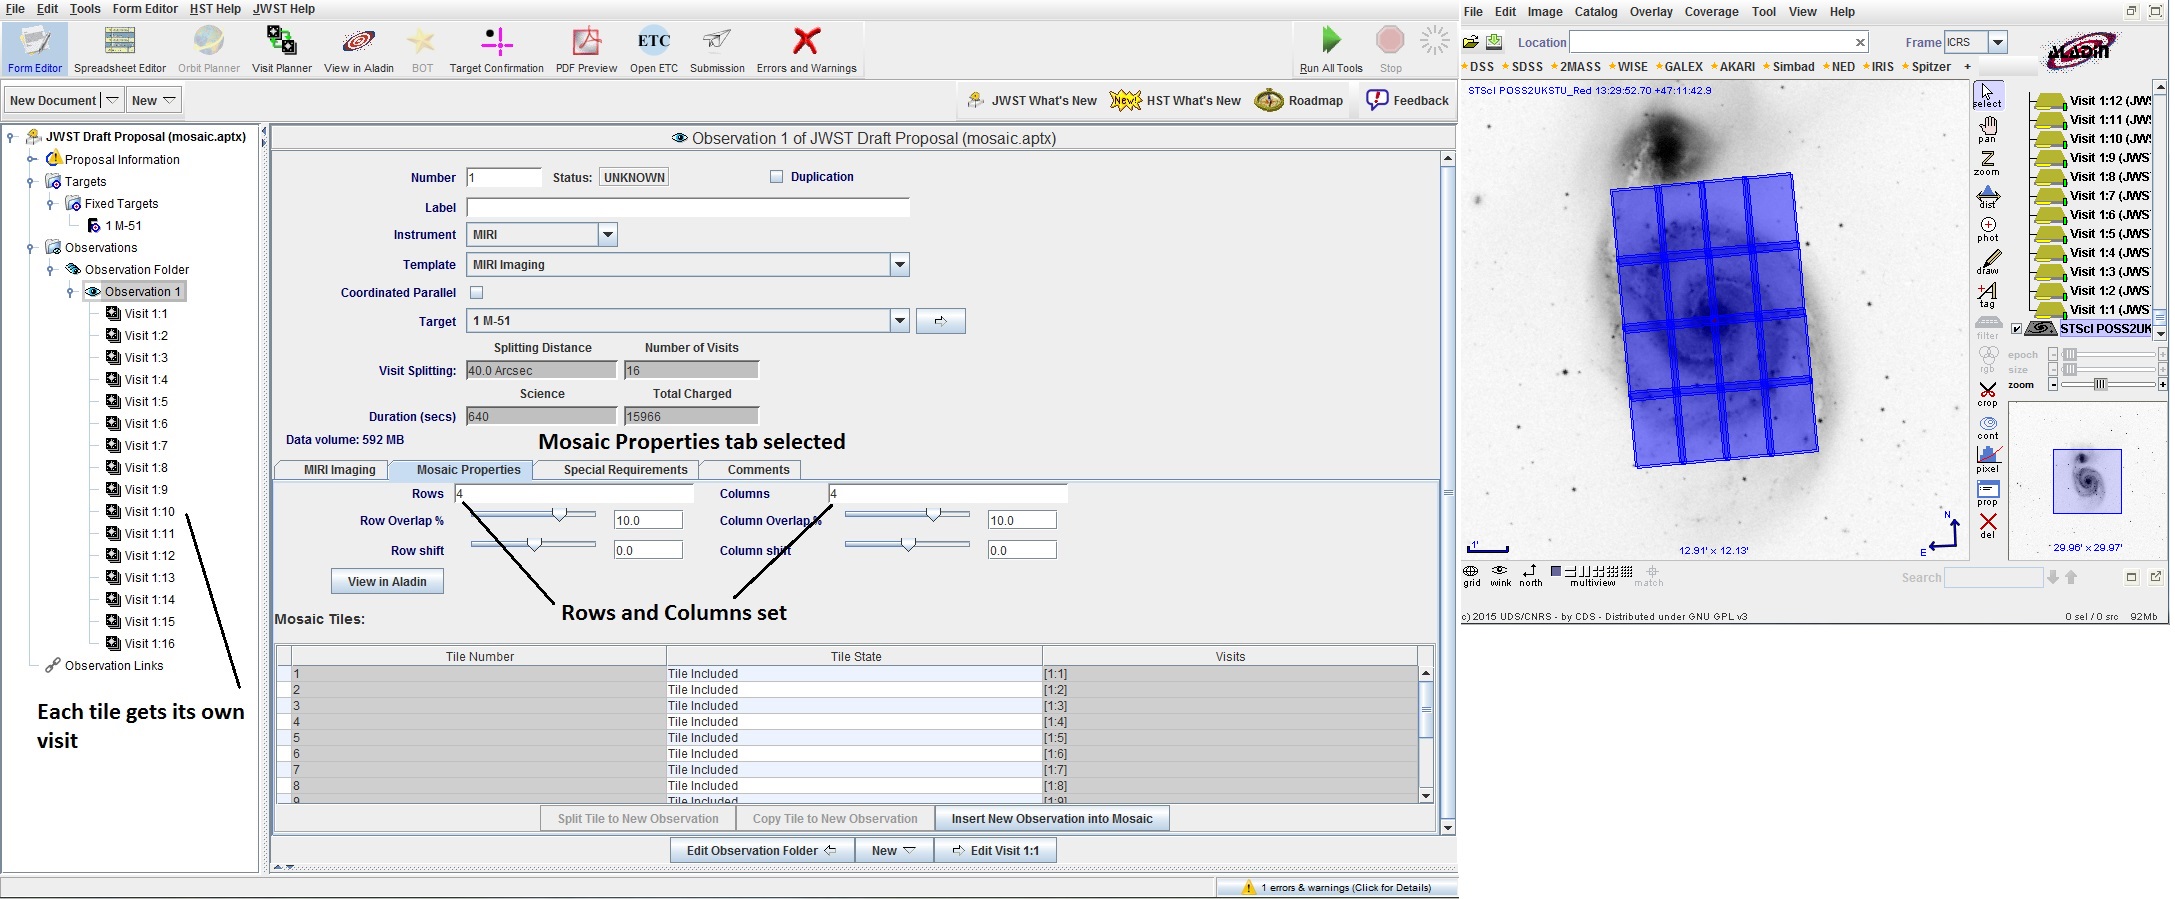
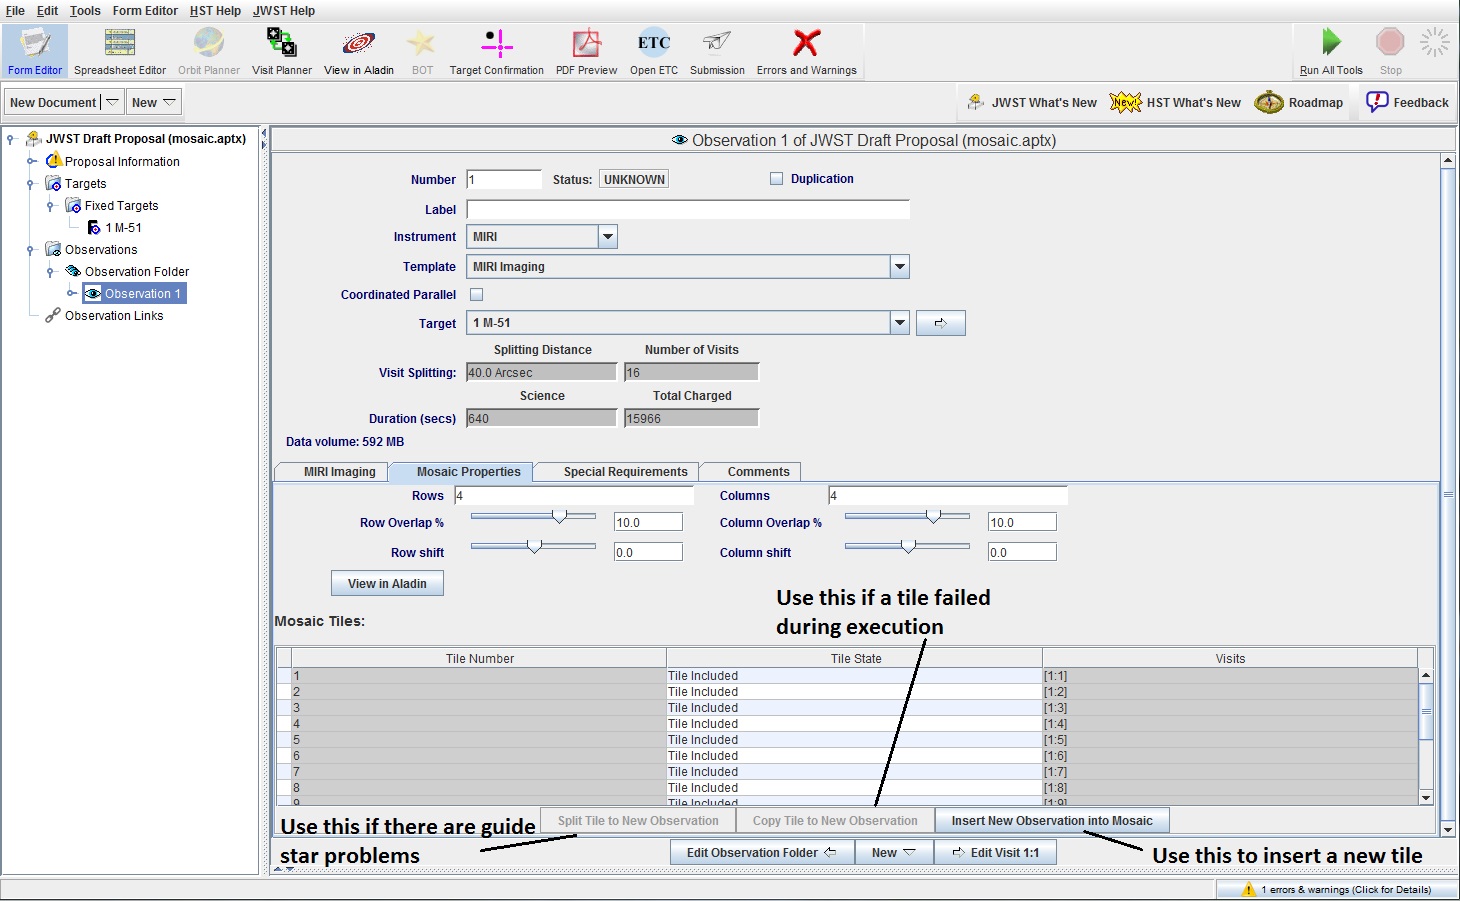
If you need to revise the mosaic, there are 3 options:
Note that the Split and Copy options are not active until you have selected a tile.
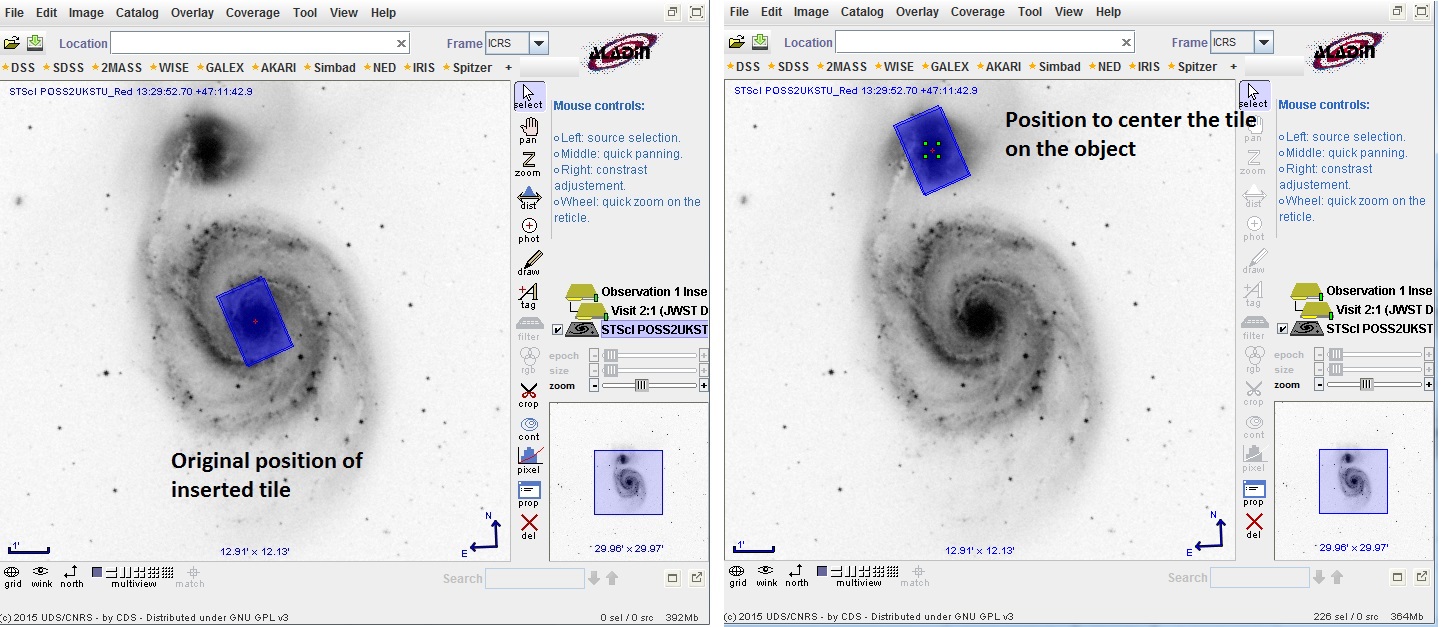
For our project, we also want to include the companion galaxy in our
mosaic, so we need to add another tile. To do this,
we will insert a new tile.
Note that a new target is
generated for the position; the  is present because the Category and Description needed to be
filled in. For the new tile, a new Observation Group is
created that contains the original mosaic and the new tile.
The new tile has, by default, the same V3PA as the original mosaic.
is present because the Category and Description needed to be
filled in. For the new tile, a new Observation Group is
created that contains the original mosaic and the new tile.
The new tile has, by default, the same V3PA as the original mosaic.

With the new tile selected in the Tree Editor, we need to move it
to its correct position (by dragging aperture to be on the
companion galaxy). When you do this, the Aladin view shows the
change to the tile position. When you are happy with the
position, click on Commit All to save the change.
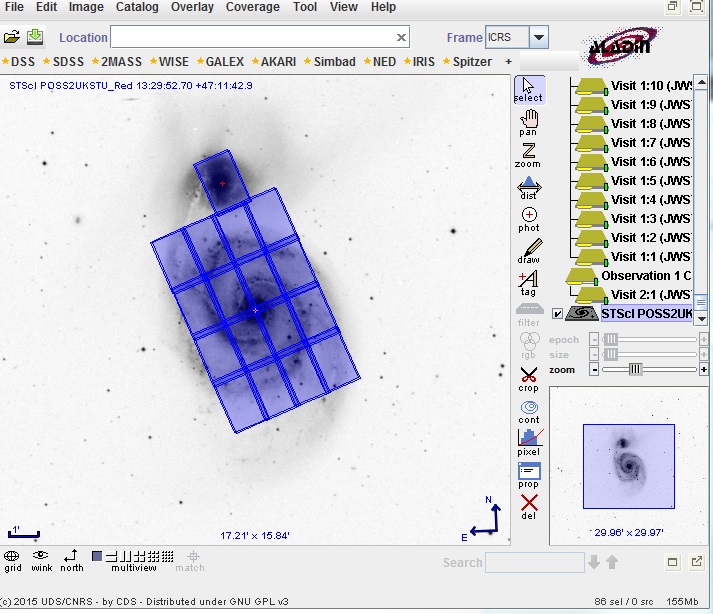
With the Observation Group selected in the Tree Editor,
you can see the complete mosaic.
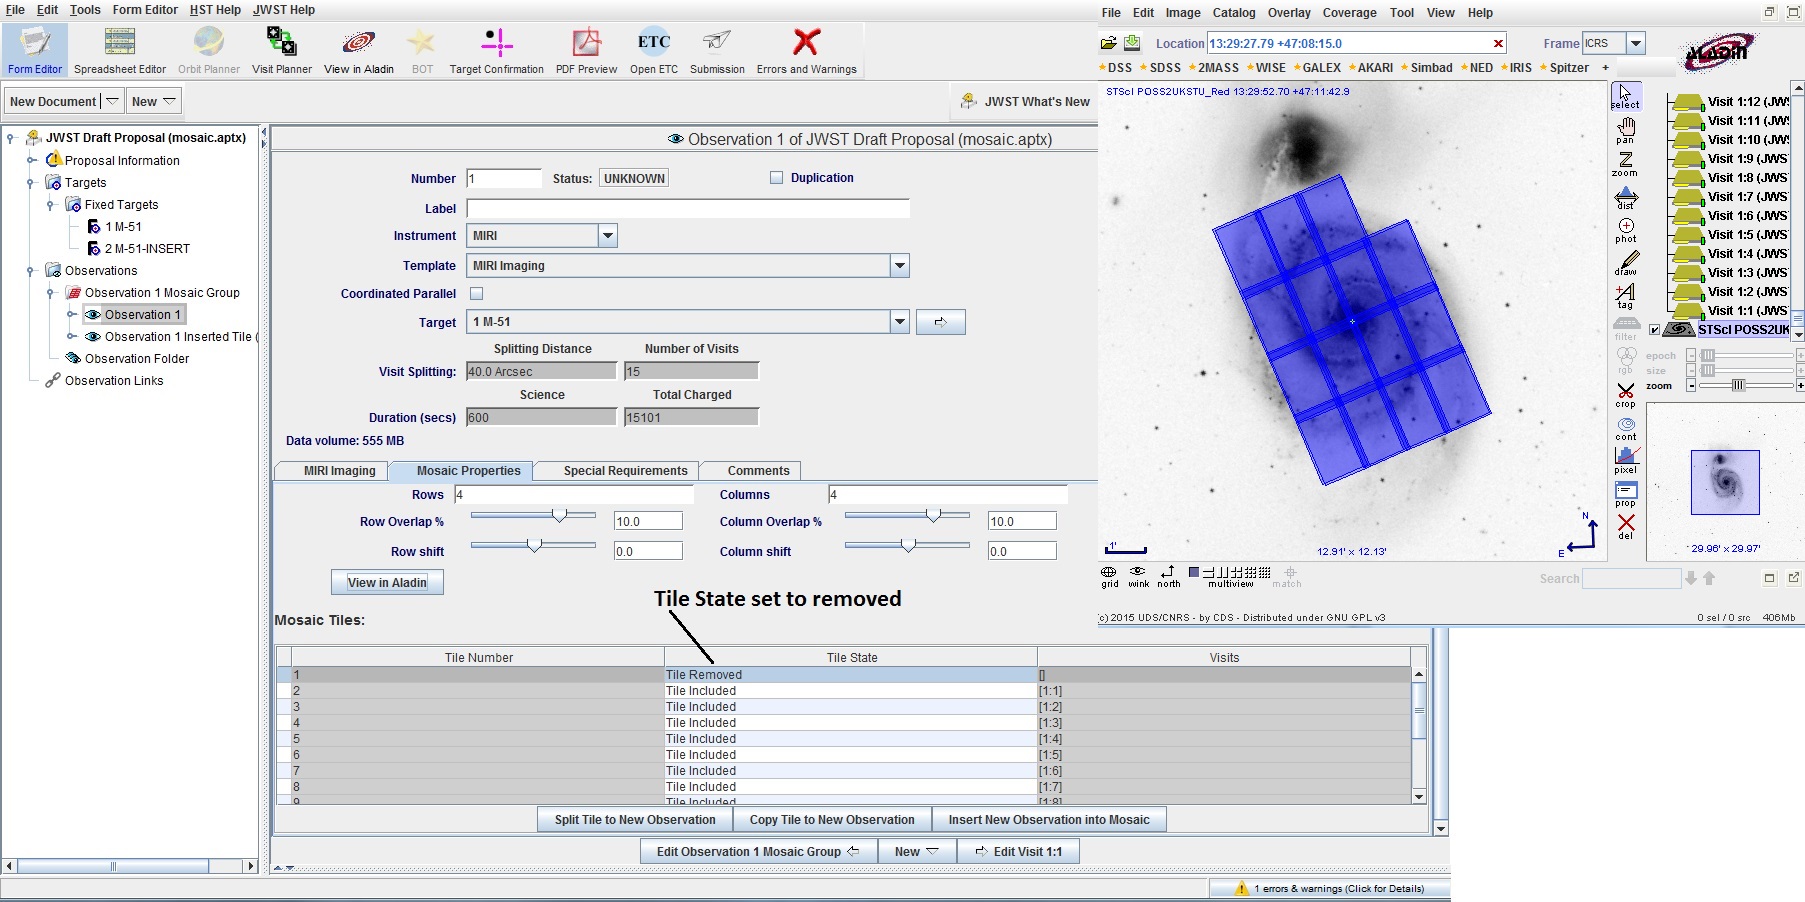
If you wanted to remove a tile from the mosaic, select
the tile to be moved and change the Tile State to be
"Tile Removed".