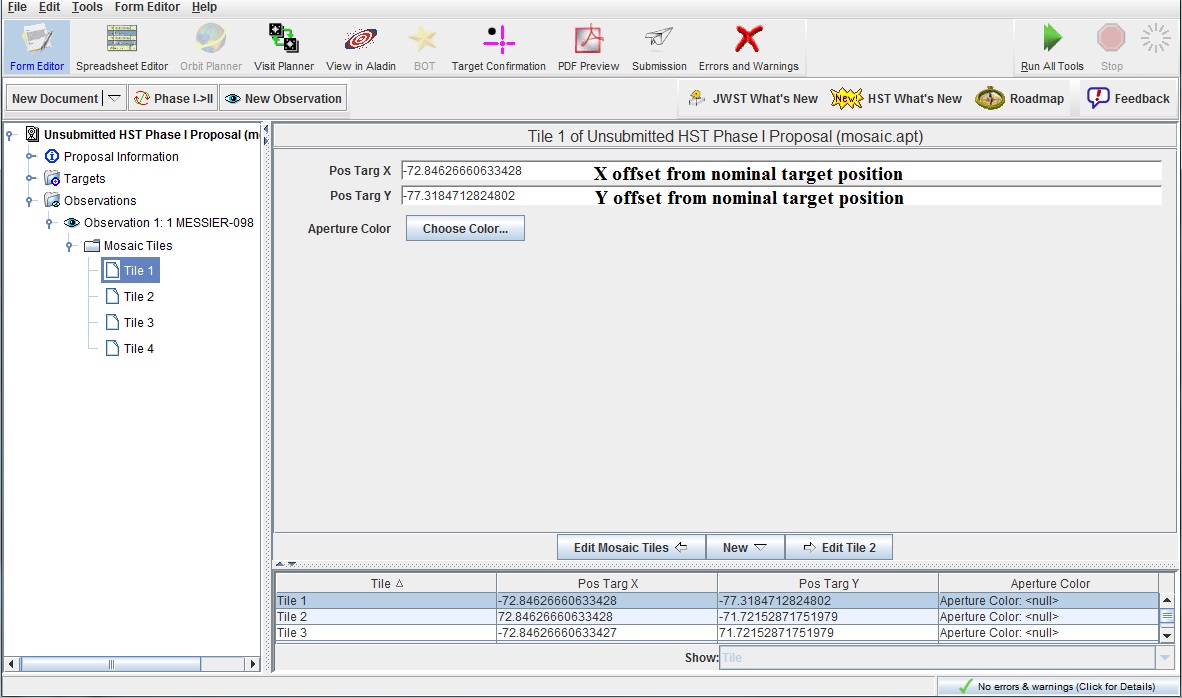
To see the positions of the individual tiles, open the Observation
and Mosaic Tiles containers.
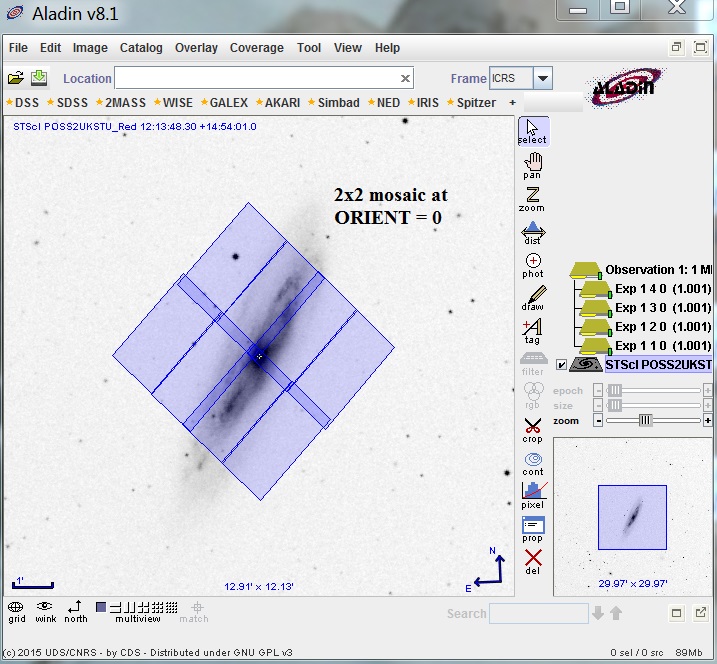
Bring up the ![]() View in
Aladin tool, and load a DSS image. By default, the apertures
will be aligned at either ORIENTation=0, or the midpoint of the
ORIENTation range specified in the proposal.
View in
Aladin tool, and load a DSS image. By default, the apertures
will be aligned at either ORIENTation=0, or the midpoint of the
ORIENTation range specified in the proposal.
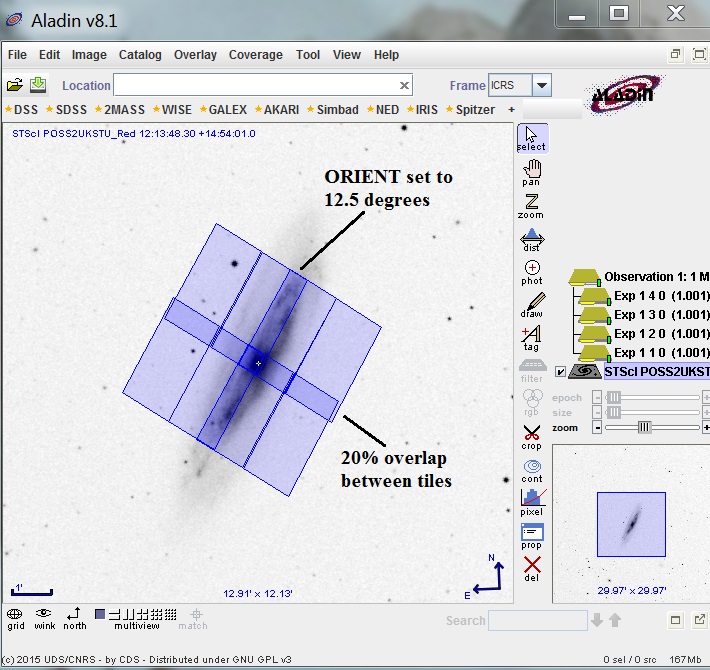
You can change the aperture orientation by grabbing the corner of the
aperture and dragging. Note that when you release the aperture, all
apertures in the mosaic will rotate to that same orientation (all
tiles in a mosaic are locked for orientation or position changes).
The ORIENTation value will
be displayed in the Aladin Orientation Angle field. You will then
need to insert the desired ORIENTation range into the proposal.
You can also change the overlap size.
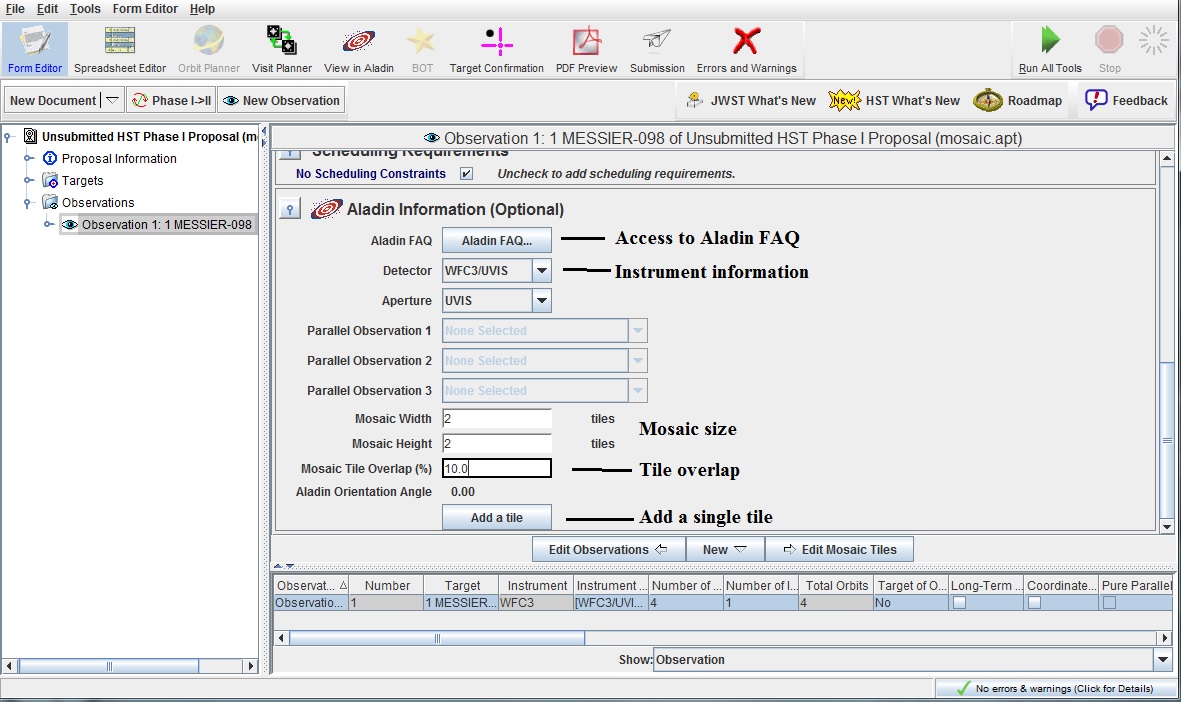
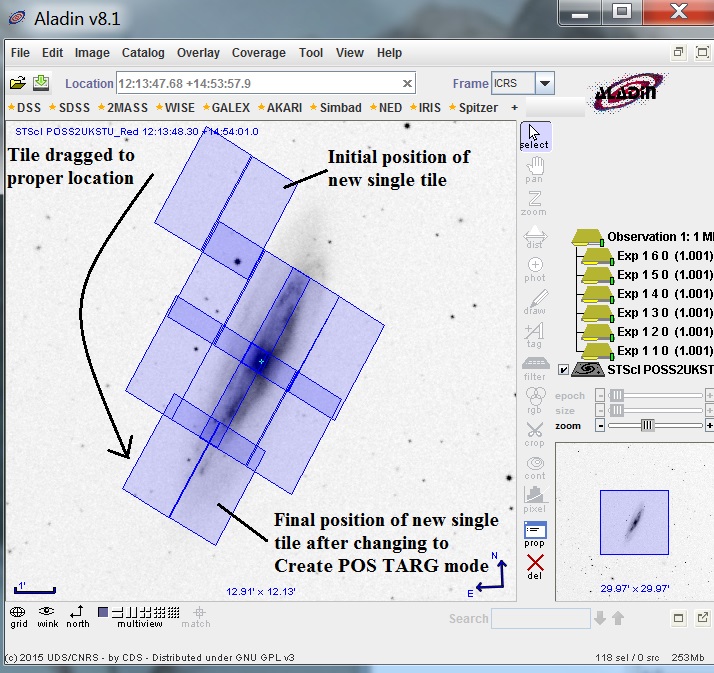
If you want to add another column or row, just change the Mosaic
Size values. If you want to add a single tile, click on the
Add Tile button. This will place a new tile at the end of the
existing mosaic. To move the tile into position, you need to
select "Create POS TARGs" mode in the APT Aladin window (if you
don't, moving one tile will move the entire mosaic). After the
tile is positioned, you will need to commit the coordinate change
to the proposal.
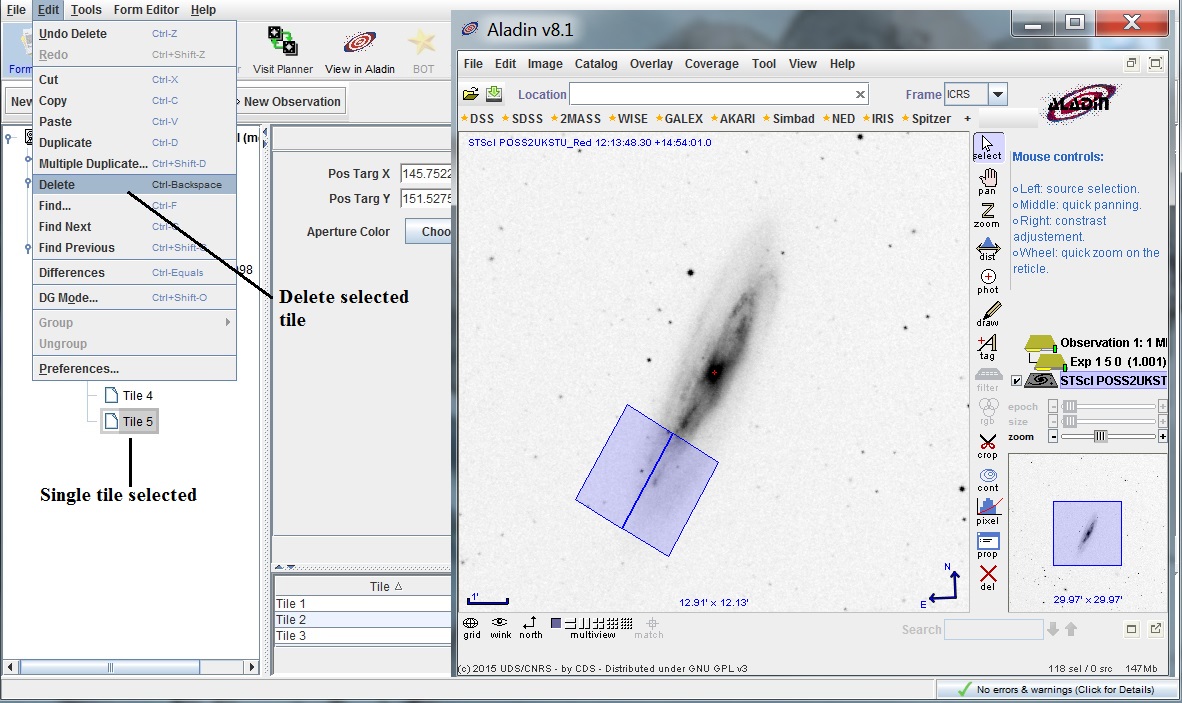
To delete a single tile, you need to first determine its tile
number in the Mosaic Tiles container. You can either select
a tile in the APT Tree or the Aladin Tree, which will display
that one tile only. Once you have found the bad tile, use the
Edit menu to delete the tile.
Once our mosaic is complete, we need to go back to the Observation form and fill in the number of iterations to reflect the final size of the mosaic.
Last modified: January 21, 2016.