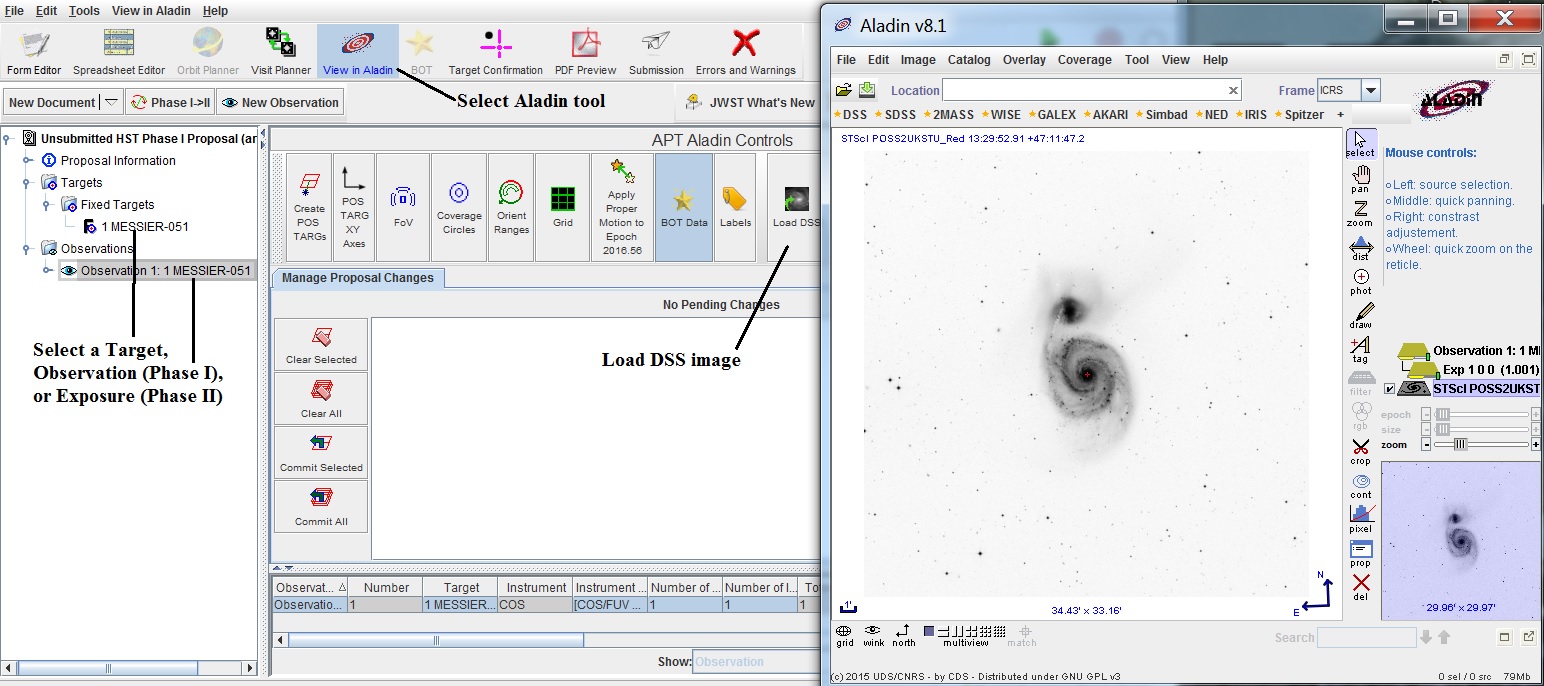
You first need to select the object you wish to investigate. Select one of the following in the APT Tree Editor:
Bring up the  View in Aladin tool,
and load a DSS image.
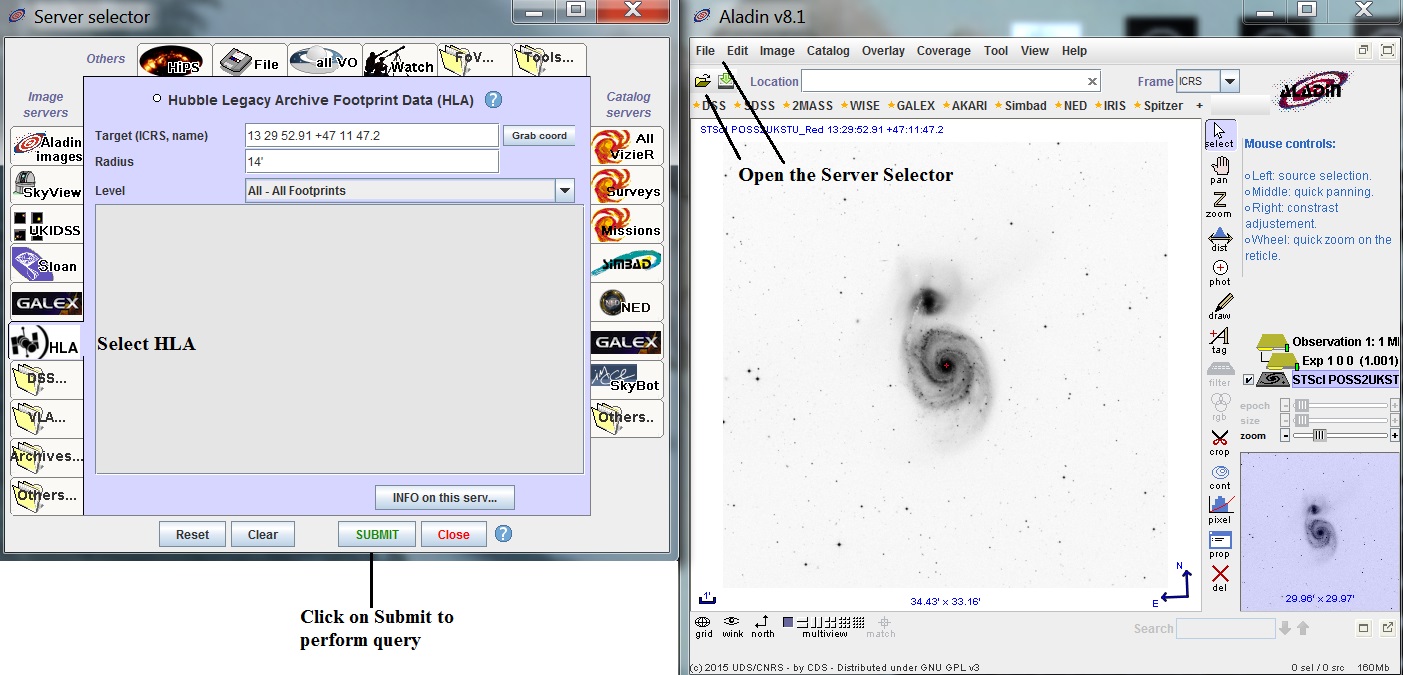
To access the HLA footprint server, go to the Aladin File menu and
select Open, which brings up the Aladin Server Selector.
On the left side (where the Image Servers are), select the HLA.
Note that since we have selected a
![]() Target,
Target,
![]() Observation, or
Observation, or
![]() Exposure in the APT Tree Editor,
the coordinates for the HLA search are
already in place. You can modify the search radius if desired.
You can select the level (but in most cases, All
is appropriate) and hit Submit.
Exposure in the APT Tree Editor,
the coordinates for the HLA search are
already in place. You can modify the search radius if desired.
You can select the level (but in most cases, All
is appropriate) and hit Submit.
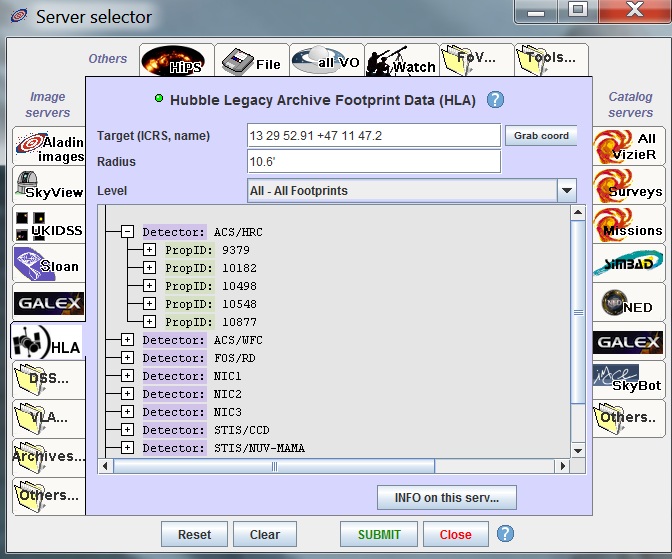
You now have a listing of all the observations in your search area, sorted
by Detector; the results are further sorted by Proposal ID.
You can change the sorting by clicking in an open area in the
server window and selecting SORT.
This brings up a popup from which you can select which parameters
you wish to sort by.
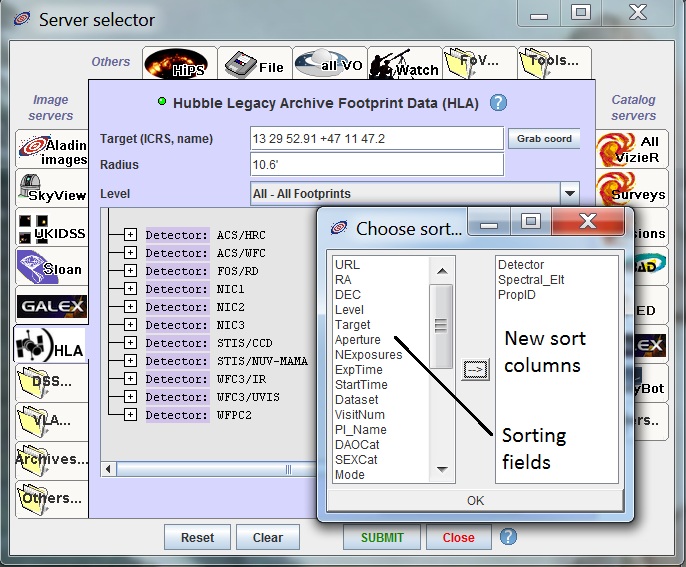
You can open the sorting parameters to see the results.
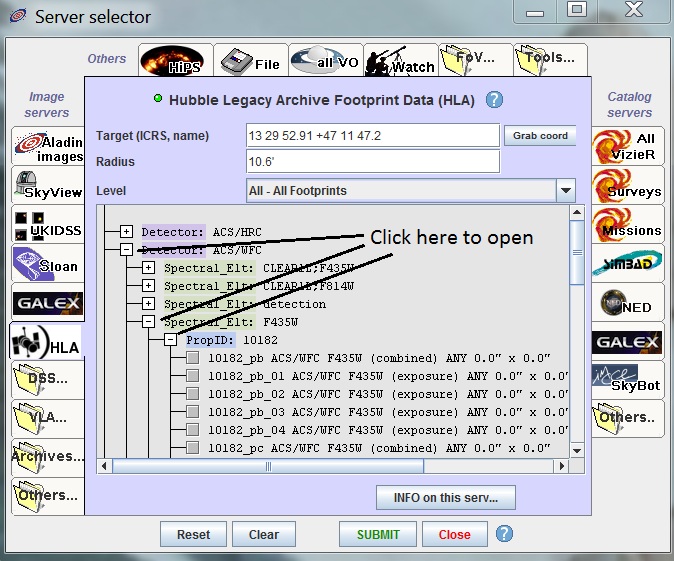
Note that the images available through Aladin are the jpeg images.
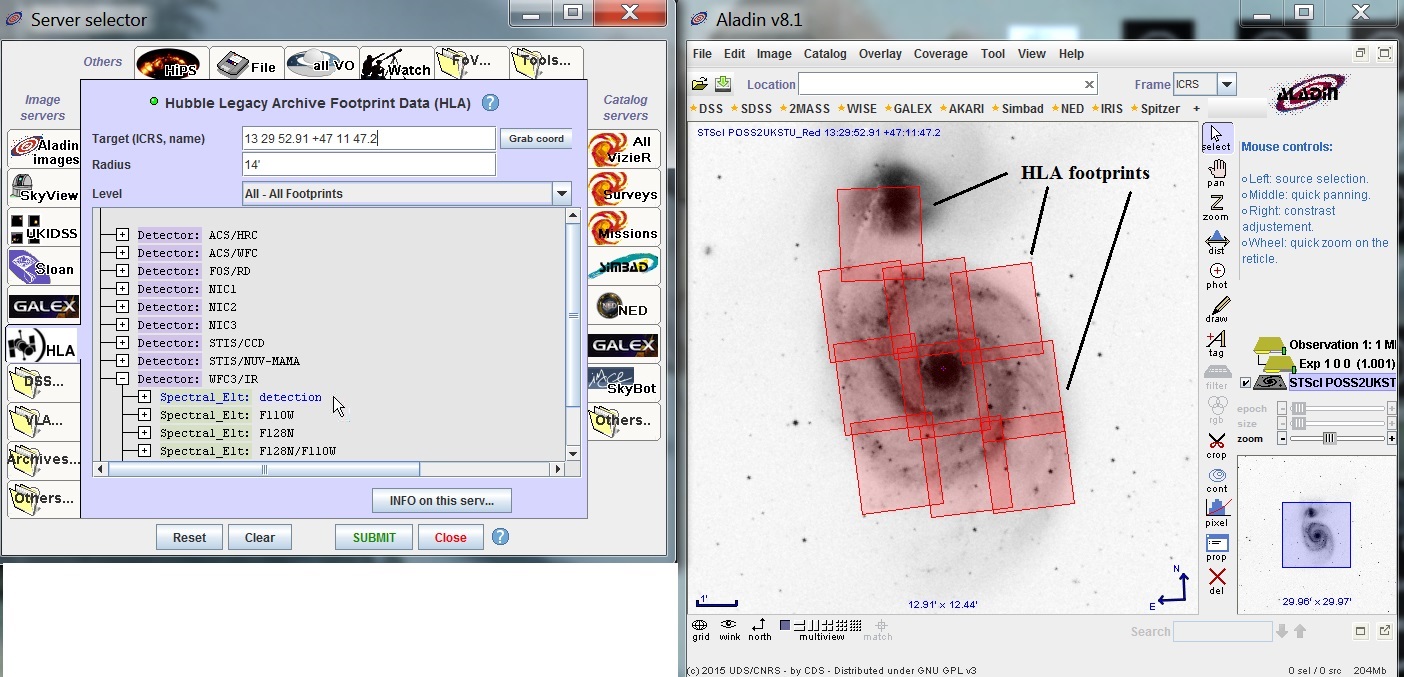
To see where the various filters appear on the DSS image, run your
cursor over the filter in the Server Selector window, and the area
where the data exists will be highlighted on the DSS image
Note that the data available here are the individual
datasets. In the HLA, you also have access to the enhanced
data products, such as the combined (e.g. multi-drizzle) data,
and source catalogs.
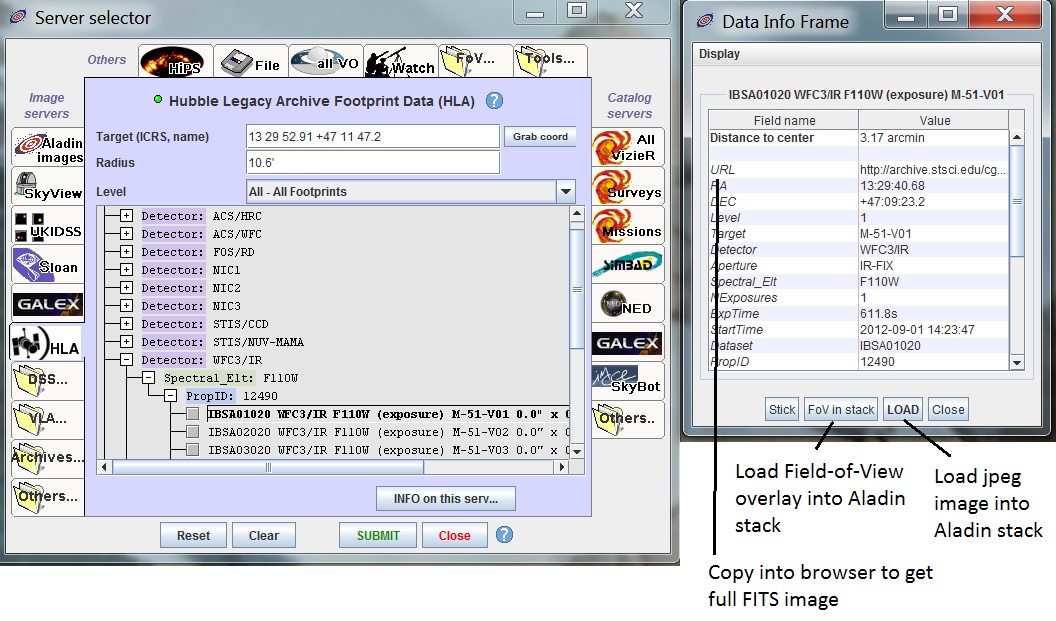
If you want to save the footprint or retrieve the image, then select
the dataset you want in the Data Info Frame.
Selecting FoV in stack will put the
footprint in your Aladin stack. Selecting Load will put the jpeg
image into Aladin.
If you want to access the full
FITS image, then copy the URL in the Data Info frame to your
browser.
Last modified: January 25, 2016.