USING THE AUTO-ADJUST FEATURE FOR ORBIT PACKING
Overview
This document describes how to use the auto-adjust feature; see the
training movie.
The auto-adjust function can be used to pack your orbits in an
automatic manner. For underfilled orbits, you select the sub-exposures
whose Actual Durations (i.e. exposure times) you want to lengthen to
use the remaining orbital visibility. Auto-adjust will divide the
unused orbital visibility time equally amongst the sub-exposures you have
selected to pack your orbits, leaving no more than 10s of unused
visibility remaining.
The auto-adjust function will work on both prime and parallel
exposures.
Exclusions
While most classes of exposures are adjustable,
certain classes are not (either with Auto-adjust or by manually setting
the Actual Durations). Non-adjustable exposures include:
- all WFC3/IR exposures
- FGS TRANS mode exposures
- all visits with LOW SKY, SHADOW, CVZ special requirements
- all exposures with internal targets (such as WAVECALs)
- there are other instrument-specific cases which will be noted later
Example 1 - WFC3
In Visit 01, we have a 600s (CR-SPLIT=2, 300s each sub-exposure) and a
1000s (CR-SPLIT=2,
500s each sub-exposure) exposure in Orbit 1, and a 4-point pattern
(200s per exposure) in Orbit 2. An initial run of the
 Orbit Planner
reveals 222s of unused orbital visibility in Orbit 1, and 479s of unused
orbital visibility in Orbit 2. We can either select all the sub-exposures or
select a subset of sub-exposures to utilize the time. The
Orbit Planner
reveals 222s of unused orbital visibility in Orbit 1, and 479s of unused
orbital visibility in Orbit 2. We can either select all the sub-exposures or
select a subset of sub-exposures to utilize the time. The
 green box next to the exposure label in the
Orbit Planner
display indicates the sub-exposure is adjustable.
green box next to the exposure label in the
Orbit Planner
display indicates the sub-exposure is adjustable.
To select all sub-exposures in the visit (if a multi-orbit visit, you
can adjust all orbits at one time), you can either manually select
each one or select no sub-exposures (which defaults to all
sub-exposures). Note that if you select no sub-exposures, and some
sub-exposures in the visit are not adjustable, Auto-adjust will only
expand those sub-exposures that are adjustable. To select discrete
sub-exposures, click on the sub-exposure in the
Orbit Planner window
or the Tree Editor. To select consecutive sub-exposures, click on the
first sub-exposure, then Shift-click on the last sub-exposure desired.
To select non-consecutive sub-exposures, click on the first
sub-exposure, then Cntl-Click on the others.
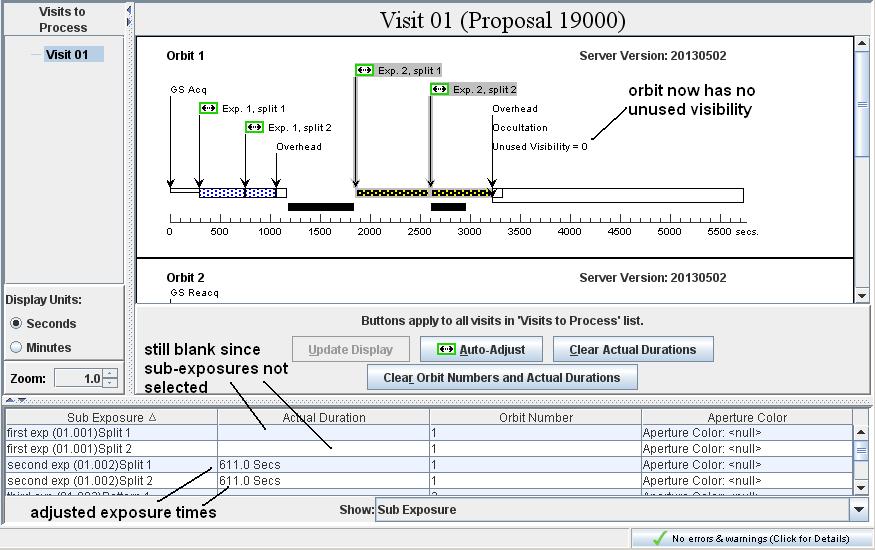
In this example, we will select the last 2 sub-exposures in the Orbit 1,
and the middle two pattern points in Orbit 2.

Clicking on the Auto-adjust button will initiate processing, and APT will
divide the unused orbital visibility equally among each sub-exposure. Note that
changing exposure times can result in changing overheads or buffer dumps,
and APT will take these into account when packing your orbits. The
results of Auto-adjust show that each sub-exposure in Orbit 1, which
were originally 300s long, has now been expanded to 611s.
In Orbit 2, the two
middle pattern points, which were originally 200s long, have been
expanded to 1087s; this leaves 41s of unused orbital visibility.
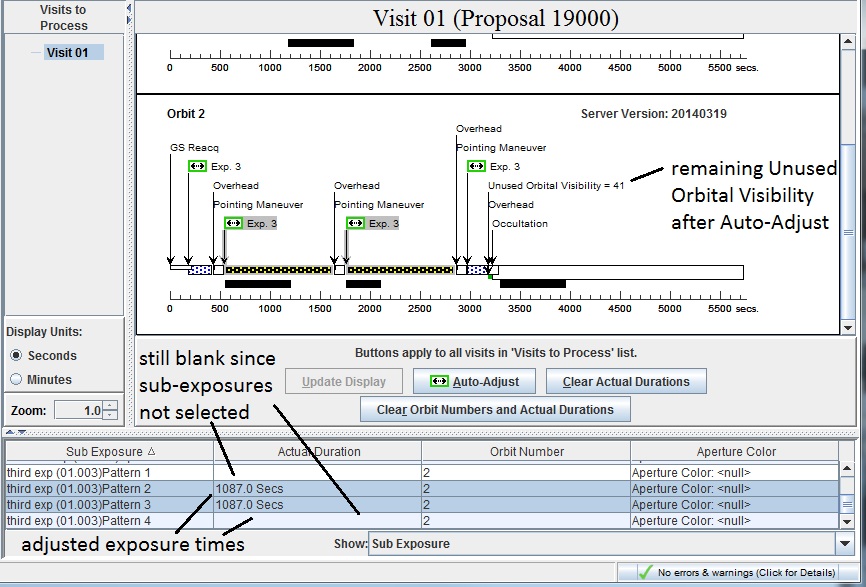
The reason there is so much unused orbital visibility (for Orbit 2) is
due to buffer management.
Note that if you did not like the results, you can reset back to the
original exposure times by hitting the Clear Actual Durations button.
If, in addition, you wanted to also clear the orbit numbers, hit the
Clear Orbit Numbers and Actual Durations button.
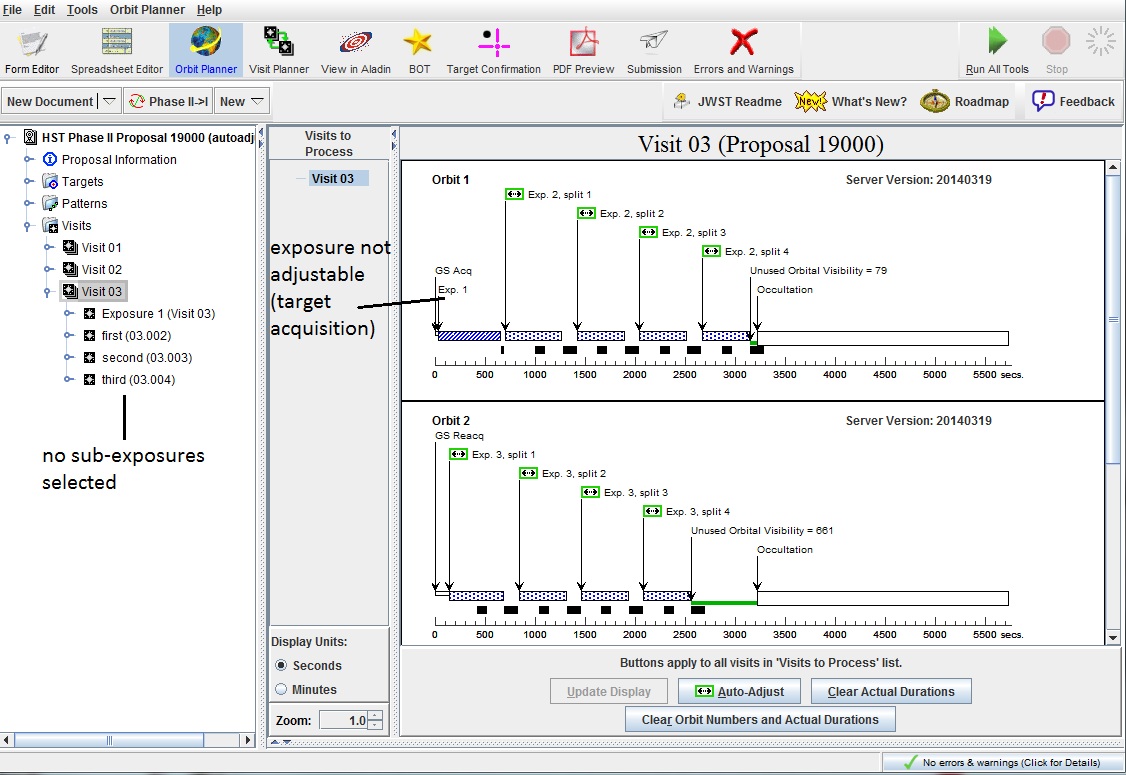
Example 2 - COS
In Visit 03, we have a target acquisition, followed by
an 1800s G230L/2635 exposure in Orbit 1, a 1800s G230L/2950 exposure
in Orbit 2, and a 1800s G230L/3000 exposure in Orbit 3.
Note that the target acquisition exposure is not adjustable.
In this example, we will select no sub-exposures, which results in all
adjustable sub-exposures being used.
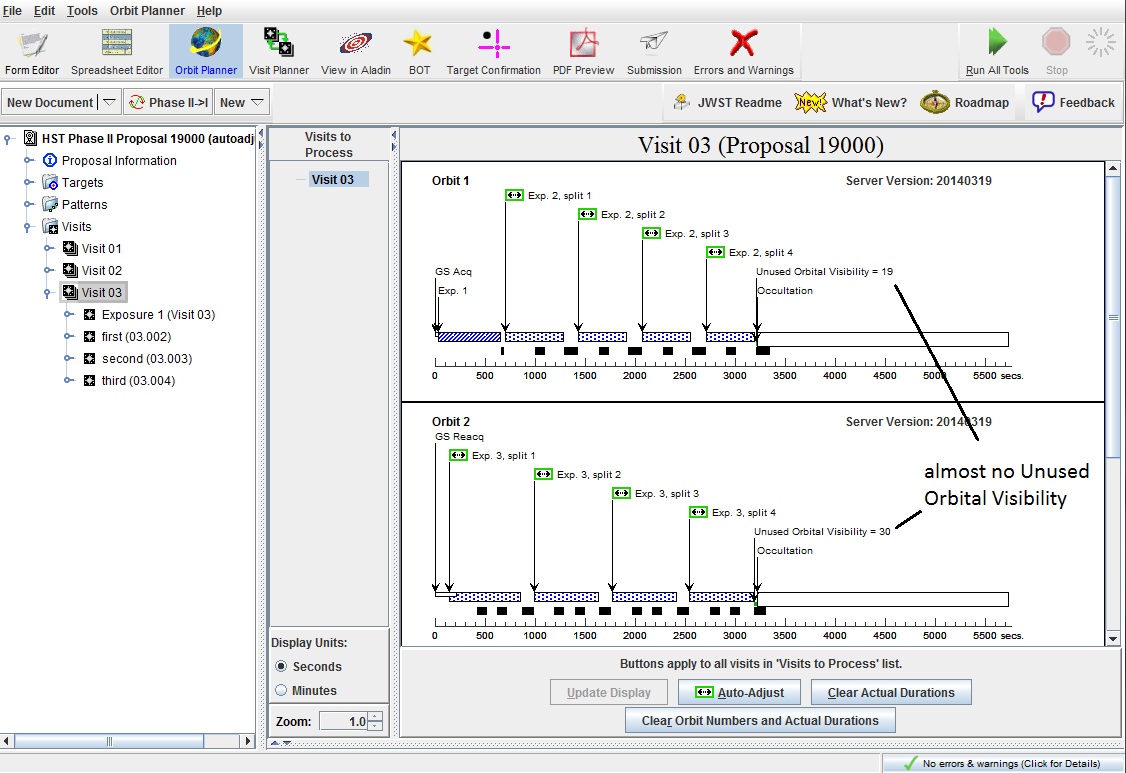
After clicking on the Auto-adjust button, we see that all orbits are
completely packed.
Last modified: May 21, 2014.