CREATING POS TARGS WITH THE ALADIN TOOL IN PHASE II
Overview
This document shows how to create POS TARGs with Aladin
(click here
to see the movie), and how to save these values directly into the proposal.
The project is to image 3 filaments in the Cas A supernova remnant
with the WFC3/IR camera.
We have HST images available which we will use to determine the
placement of the apertures. We have measured the position of a star
in the field, and will determine offsets from that star to the filaments.
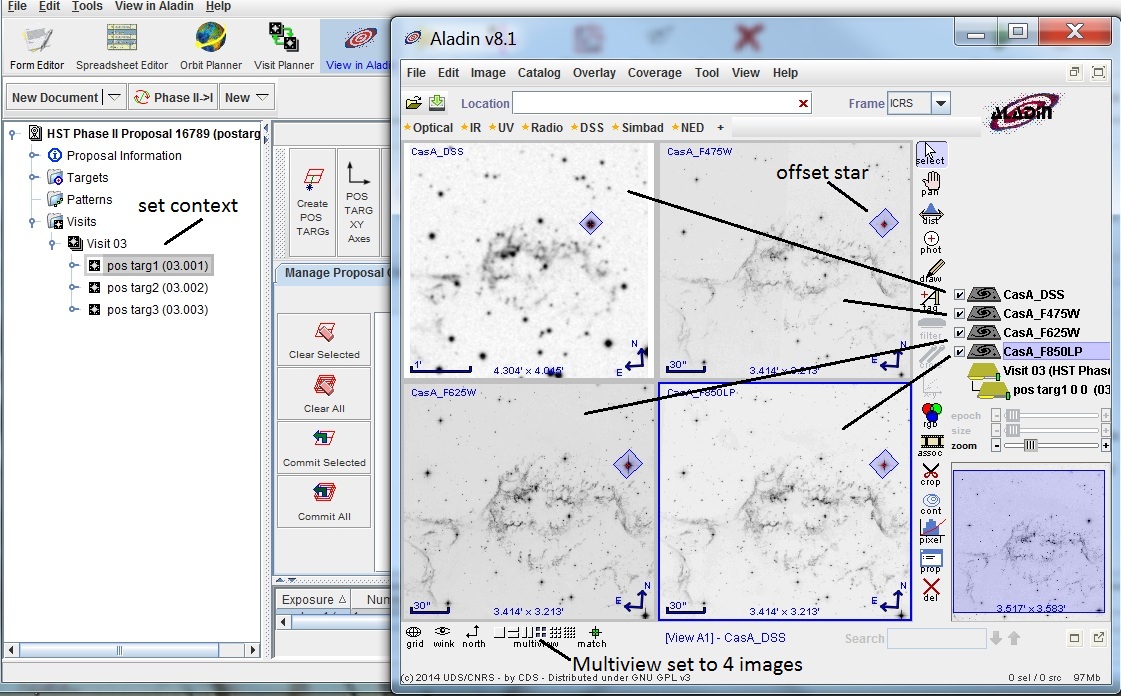
We have already loaded in the 3 HST images, as well as the
DSS image, into  Aladin.
The Multiview 4-panel mode has been selected to display all
4 images in the Aladin display. Note that the aperture is centered
on the measured star, and that Exposure 1 is selected.
Aladin.
The Multiview 4-panel mode has been selected to display all
4 images in the Aladin display. Note that the aperture is centered
on the measured star, and that Exposure 1 is selected.
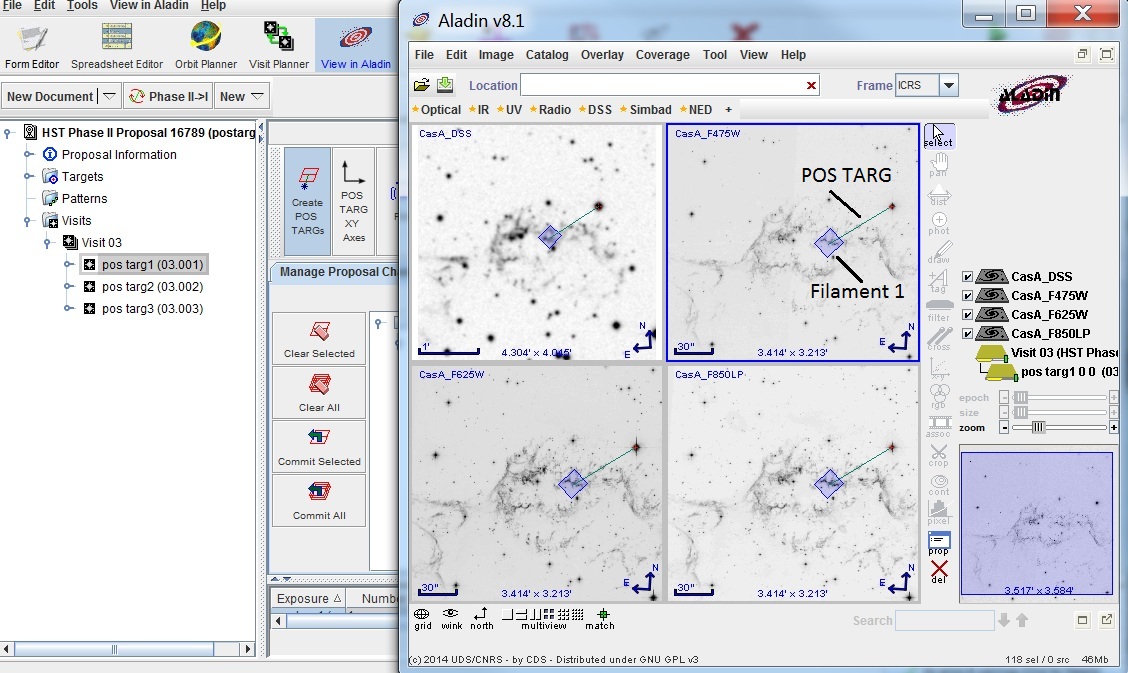
In the APT window, select the
 Create POS TARG mode option.
In the Aladin window, drag and place the aperture on the first filament of
interest. Note the line drawn from the star to the filament, indicating
a POS TARG has been created, and that the POS TARG appears on all 4
images.
Create POS TARG mode option.
In the Aladin window, drag and place the aperture on the first filament of
interest. Note the line drawn from the star to the filament, indicating
a POS TARG has been created, and that the POS TARG appears on all 4
images.
Select exposures 2 and 3 and places the apertures on the remaining
2 filaments. In the APT window, you will see the POS TARGs in
the pending changes area.
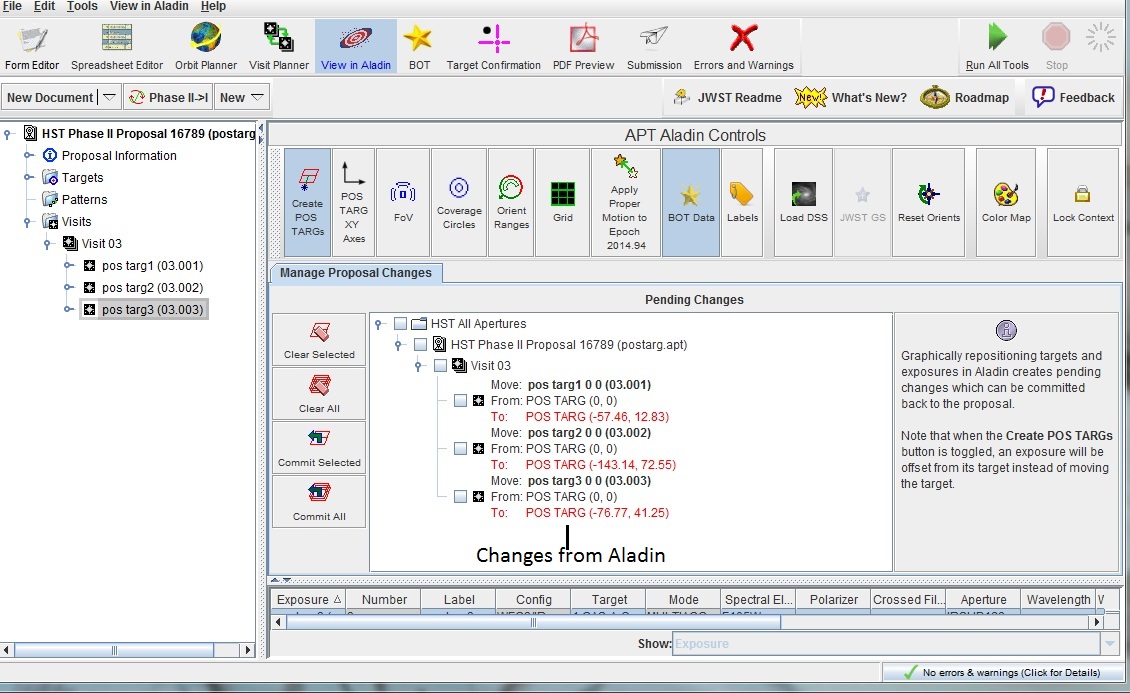
You could select all the changes individually, select the Visit, or
select the Commit All option to save the changes to the proposal;
similarly, if you did not like the changes, you could clear them as
well.
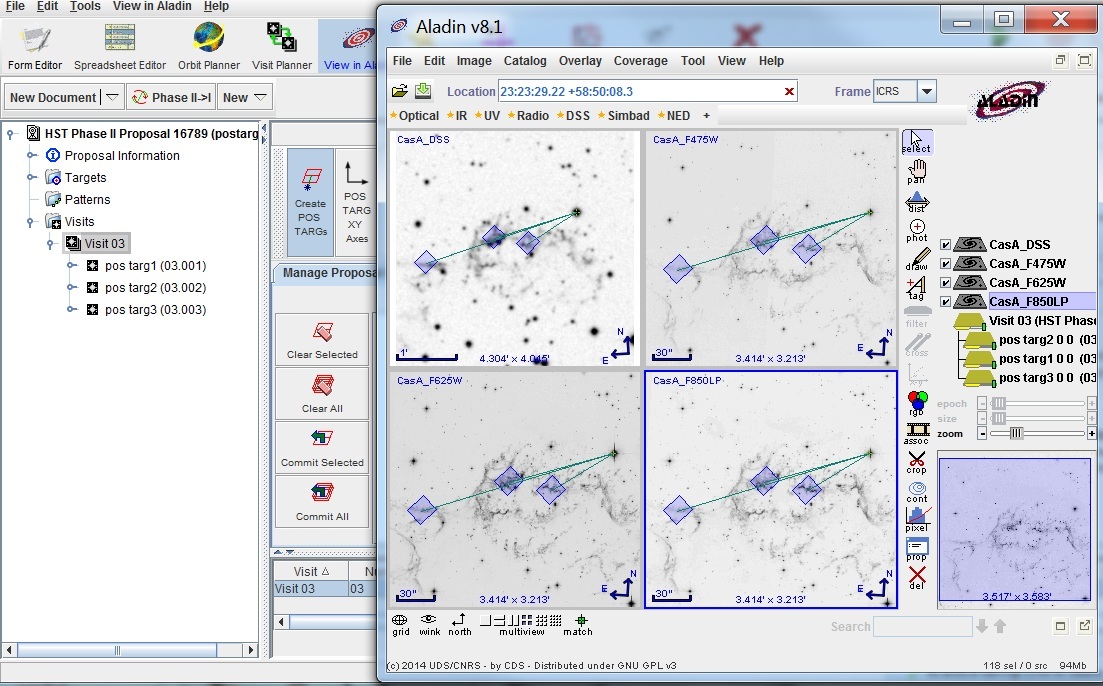
With the  Visit container selected
in the APT Tree Editor, go back to the Aladin window to review
the results.
Visit container selected
in the APT Tree Editor, go back to the Aladin window to review
the results.
If you want to see the detector X-Y axes, click on the
 POS TARG XY Axes
button in the APT window.
POS TARG XY Axes
button in the APT window.
Note that the POS TARG values we have generated will only
place the aperture on the filaments for the ORIENT value
we had when we made the POS TARGs. You should be sure to
have specified that exact ORIENT value in your proposal.
Last modified: May 30, 2014.