Using Aladin With APT In Phase II
Overview
The Aladin Tool (click here
to see the movie) allows you visualize your HST observations. While the basic
functions are the same as in Phase I, the context is different (you
have real instead of draft apertures), and there is a save to proposal
capability not available in Phase I. There are separate help files and
movies on specific Aladin topics (such as blinking, reviewing
mosaics, etc.).
In this document, the project is to image the nucleus of M51, as well
as that of the companion galaxy with the WFC3. We have 2 exposures do to
this - one on M51, and the second offset (using a POS TARG) to get
the companion.
Before initiating Aladin,
you should select the exposure(s) you wish to visualize. You
can select your exposure(s) by either selecting the individual
 exposure or group of exposures in
the heirarchical editor. If
you wish to view an entire visit, you can select the
exposure or group of exposures in
the heirarchical editor. If
you wish to view an entire visit, you can select the
 Visit
container, and if you wish to view the entire proposal, select
the
Visit
container, and if you wish to view the entire proposal, select
the  Visits container.
Then select the
Visits container.
Then select the  Aladin button at the top of the display, which will bring up the
Aladin viewer.
Aladin button at the top of the display, which will bring up the
Aladin viewer.
Note that the Aladin apertures are semi-transparent. If you want to
adjust the transparency, then under each exposure in the Aladin Tree,
adjust the slider to get the desired
opacity. If you want to keep all the apertues for a Visit
in sync, then use the slider onthe Visit rather than an exposure
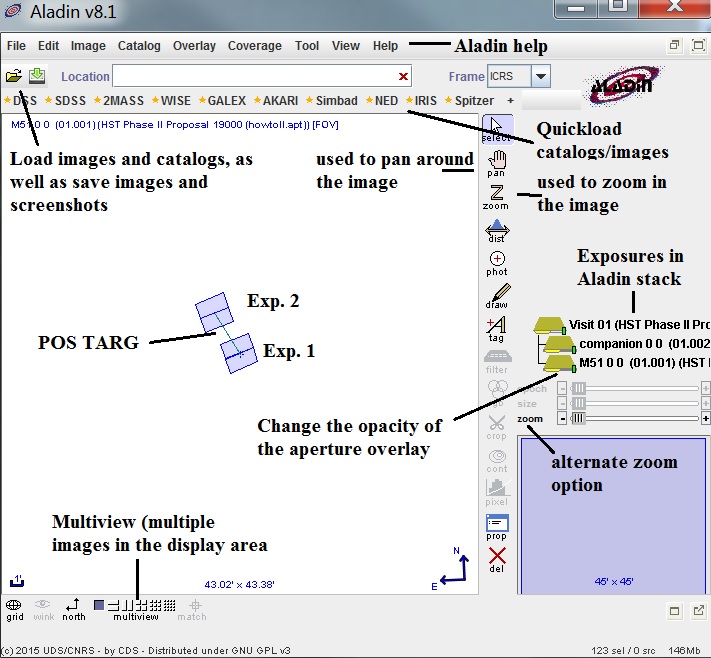
You can change the image scale (Zoom) by either using the Zoom slider
under the Aladin Tree, by clicking on the spot in the image you
want the zoom centered and rotating the mouse wheel (forward will
zoom in while backwards will zoom out), or selecting th Zoom button in
the toolbar, centering on the area of interest, and clicking to zoom in
(shift-click will zoom out).
You can pan around the image by selecting the Pan
function in the option bar. To disable the Pan, just move the
cursor off of the display area.
In the APT window are controls for what is shown in the Aladin display.
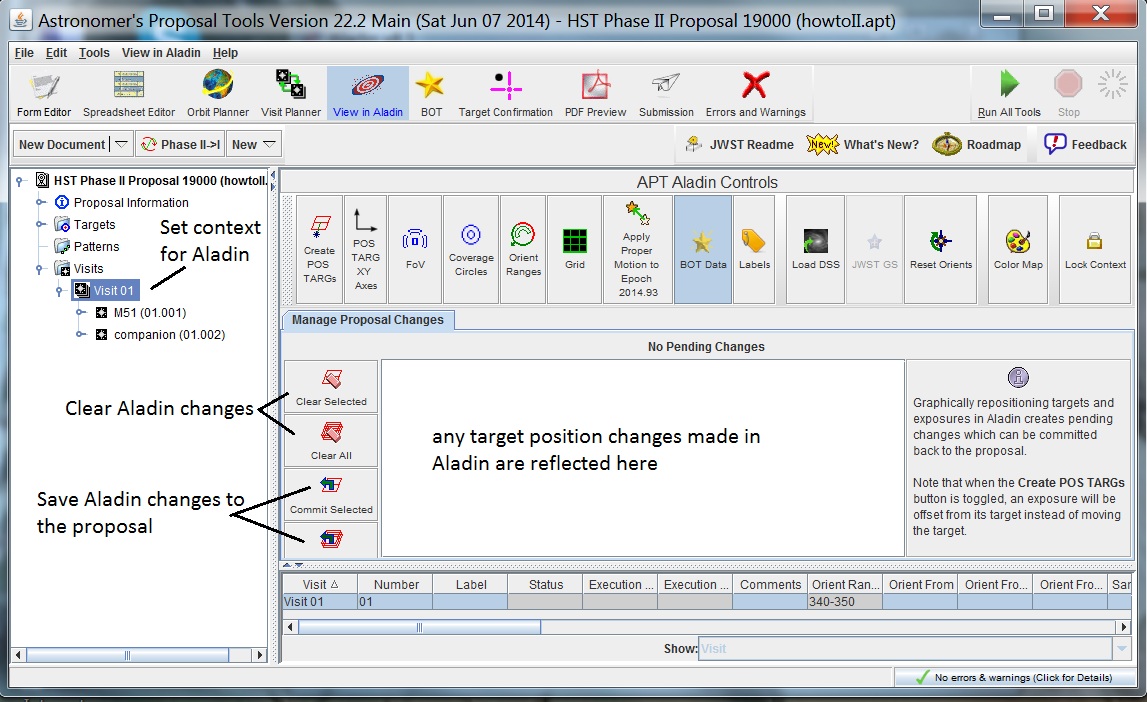
The buttons along the top perform the following functions:
 Create POS TARGs - when
selected, any aperture position changes you
perform in Aladin will be used to create POSition TARGet offsets, rather
than changing the position of the target.
Create POS TARGs - when
selected, any aperture position changes you
perform in Aladin will be used to create POSition TARGet offsets, rather
than changing the position of the target.
 POS TARG Axes - when selected, the XY axes for POS TARGs are displayed
 FOV - when selected, the HST Field of View is displayed.
 Coverage Circles - when selected, circles indicating the region of
the sky covered by the aperture that will always be imaged (inner) and
may be imaged depending on Orientation (outer).
Coverage Circles - when selected, circles indicating the region of
the sky covered by the aperture that will always be imaged (inner) and
may be imaged depending on Orientation (outer).
 Orient Ranges - when selected, a circle indicating the valid
(green) and invalid (red) orientations (based on values in the proposal).
Orient Ranges - when selected, a circle indicating the valid
(green) and invalid (red) orientations (based on values in the proposal).
 Grid - when selected, a coordinate grid is displayed.
 Apply Proper Motion to Epoch - when selected,
the proper motion of the target is applied (and a motion vector displayed) in
the Aladin display to the Epoch today+6 months.
Apply Proper Motion to Epoch - when selected,
the proper motion of the target is applied (and a motion vector displayed) in
the Aladin display to the Epoch today+6 months.
 BOT Data - when selected, results from the Bright Object Tool are
displayed (see separate documentation on this tool).
BOT Data - when selected, results from the Bright Object Tool are
displayed (see separate documentation on this tool).
 Labels - when selected, each aperture is labeled with Observation/Exposure name
 Load DSS - loads a DSS image (POSS2 Red) for
the selected exposures. To load a different type/size of image, use
the Aladin Load function.
Load DSS - loads a DSS image (POSS2 Red) for
the selected exposures. To load a different type/size of image, use
the Aladin Load function.
 Reset Orients - resets any Orient values you modified
to those specified in the proposal.
Reset Orients - resets any Orient values you modified
to those specified in the proposal.
 Color Map - allows for the specification of the colors of plotted
items (e.g. apertures).
Color Map - allows for the specification of the colors of plotted
items (e.g. apertures).
After loading a DSS image, we see the aperture overlaid on the image.
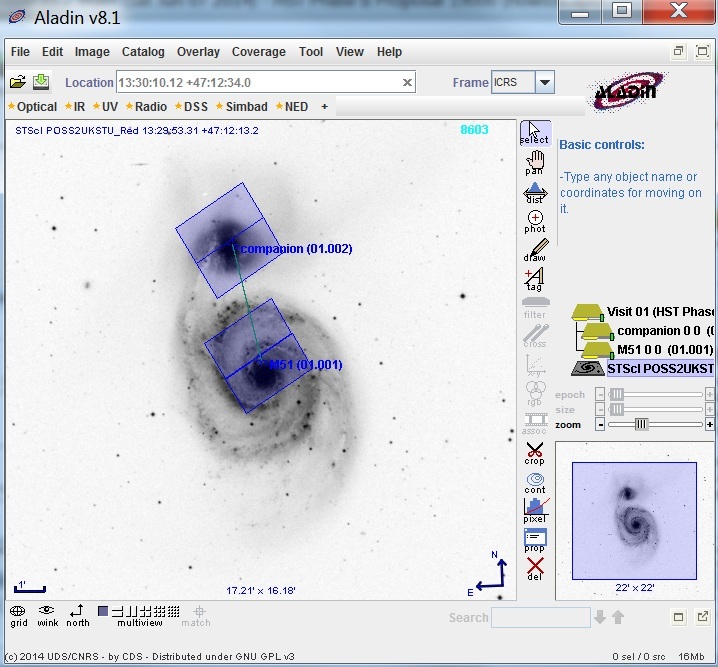
Adjusting the exposure
We want to have the the nucleus centered on the UVIS chips, so we need
to change the location of the aperture. Grab the aperture (make
sure you see the hand icon), and move it
to center the nucleus.
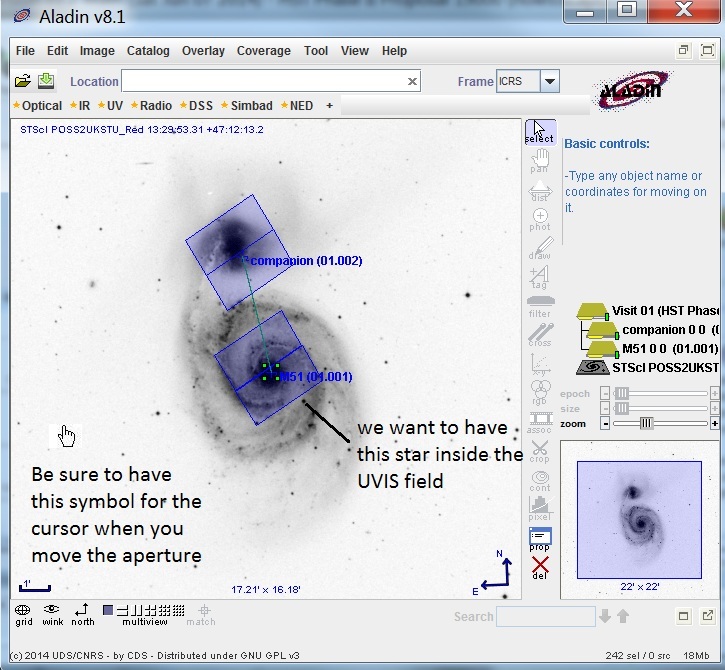
We also want to have the indicated star
in our image, so we need to change the orientation of the apeture.
Grab the corner of the aperture (make sure you see the
 icon) and rotate the aperture.
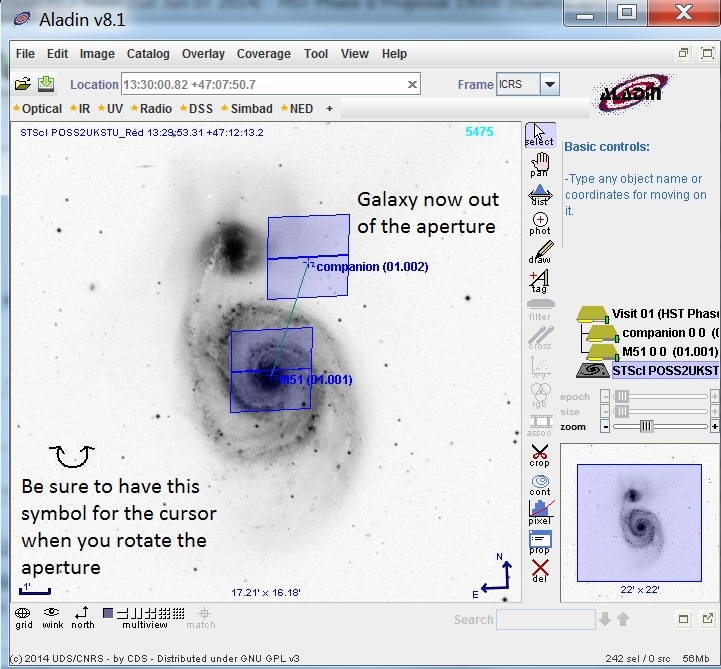
Note that our second exposure is now off the companion (since we
changed both the object position and the orientation). We therefore
need to change the POS TARG to accomodate these changes.
If we moved the aperture now, we would change the position of the
target (as we have already done), rather than change the POS TARG.
We need to go back to the APT window and change the operating mode.
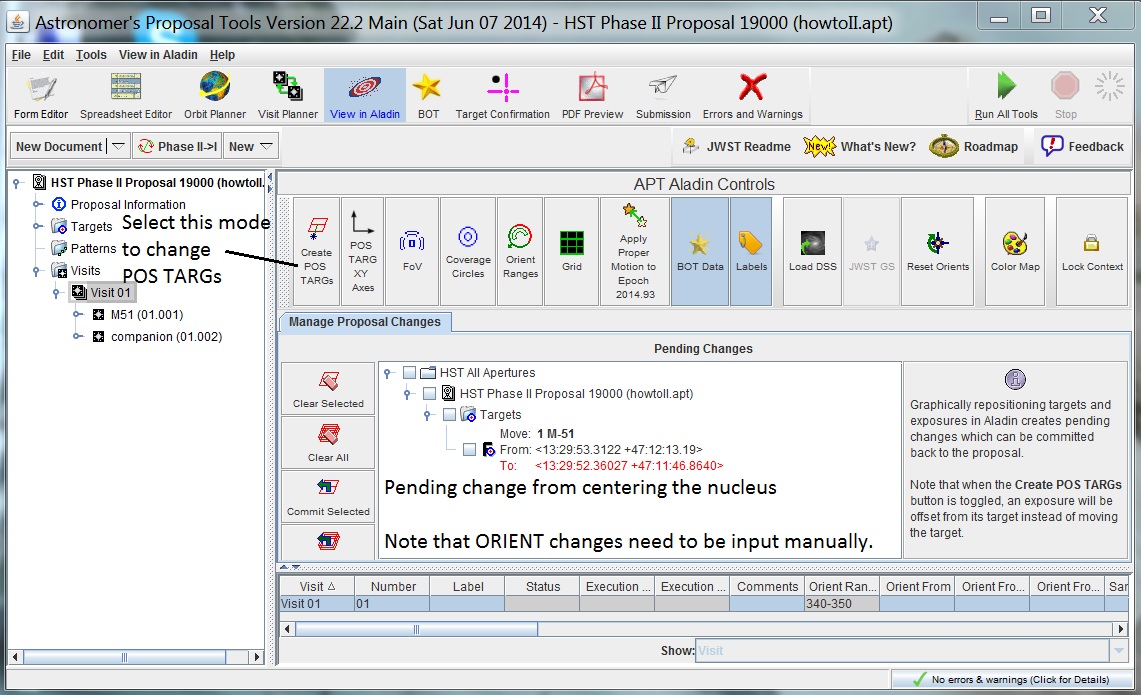
To change the POS TARG, we need to click on the
Create POS TARGs
button. Also note the pending change for the coordinates that we
made. If you change your mind about including the star in
the image, you can
 Clear the changes to remove
the target motion,
and click on
Reset Orients to remove the
Orient change. At present,
APT does not save any Orient changes made in Aladin, so these will
need to be manually input.
Clear the changes to remove
the target motion,
and click on
Reset Orients to remove the
Orient change. At present,
APT does not save any Orient changes made in Aladin, so these will
need to be manually input.
We can now go back to the Aladin window, grab the aperture
(again, make sure you see the hand icon) and
center on the companion galaxy.
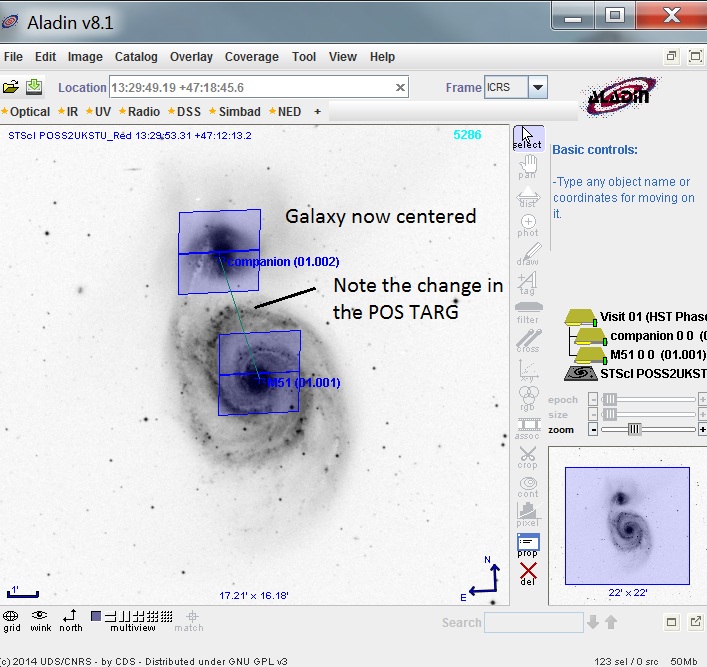
Now that we have completed our changes, we can go back to the APT window
and commit them, as well as manually update the Orientation.
Overlaying catalogs
You can overlay catalogs in Aladin. Under the File Menu, select
Load catalog.
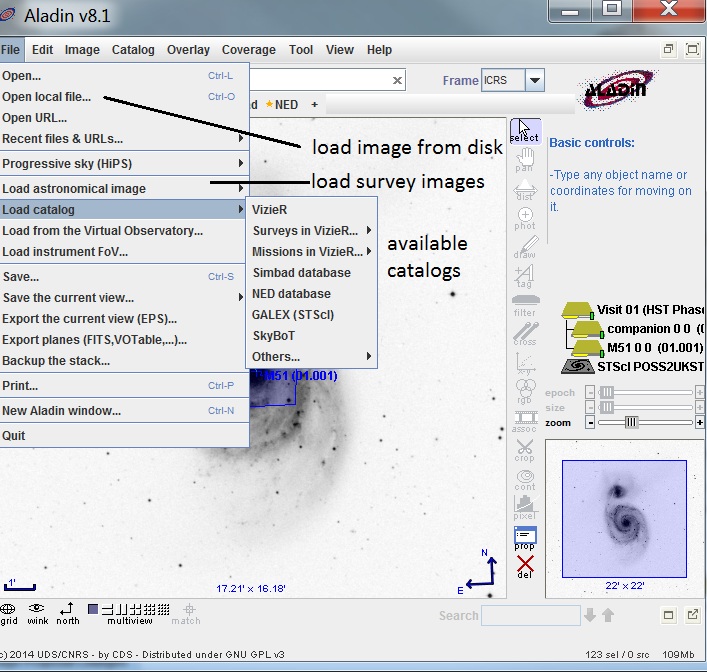
There you see the list of available catalogs.
Note that you can also load images from your disk.
Click on SIMBAD, which brings up the Server selector window,
and then hit Submit. This will perform a search of
the SIMBAD database for all objects in the field, and create a
SIMBAD plane in the Aladin stack.
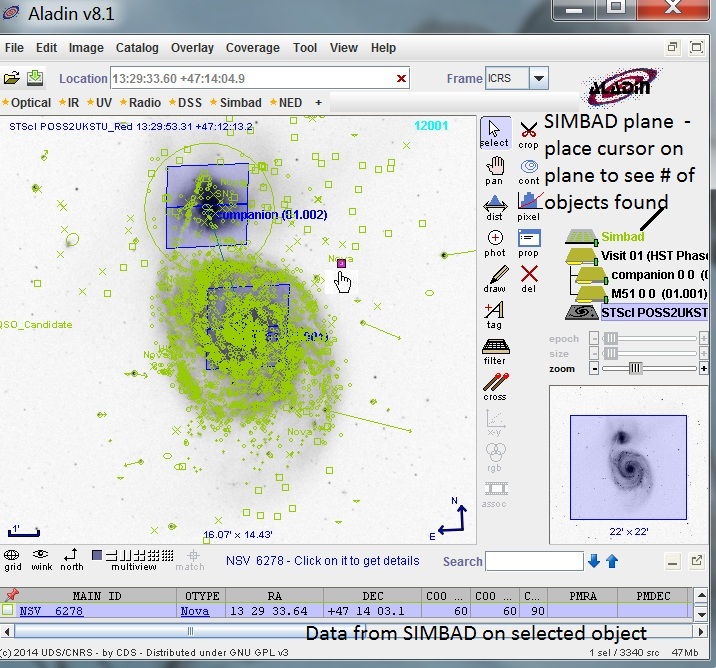
Note that if you put your cursor on the Simbad plane,
it will you the number of objects in the catalog. To get information
on a SIMBAD source, go to Select mode in Aladin and click
on one of the objects (note that object flashes, and you get the
hand icon). The information on the object is displayed
in the spreadsheet. To get the field definitions, put your cursor
in the spreadsheet field.
If you want to examine multiple objects, make a box around the
area of interest, and all objects contained in that box will
be shown in the spreadsheet. Putting your cursor on the object
name in the spreadsheet will cause that object to flash in the
image display.
You can display multiple catalogs at the same time. If a given
object is in mutliple catalogs, clicking on it will display the
information for all catalogs in the spreadsheet.
Finally, if you want to save a copy of the image, click on the SAVE option
in the File Menu, and select the option appropriate for your needs.
Last modified: June 2, 2016.